Wednesday, April 29, 2009

In the zone


Ooh, what a productive day I had! I sewed another blue strip (remember those?), making a total of 4. Only 5 more to go! Whew. Its tedious but if I get one done first thing, then I reward myself with working on something fun. Today's fun was threefold: working on the final stages of a quilt long in the making and starting a fun quick new project. Pictured here is a new piece of my "Inner Landscape" series titled "Sowing the Blade Garden." I have it laid out here with batting and backing. Actual quilting is next and since its a relatively small piece, that should be done soon. I think I'll be doing a lot of contour quilting on this one. Its a rather stark composition, I'll admit but that's the way it had to be. I had it lurking in the back of my studio for over a year but it just didn't want any further embellishments. I'm a firm believer in listening to the piece and letting it tell me what it needs. Yeah, I know I'm personifying here just a bit, but that's the way I frame it to myself when I'm creatively stuck and am trying to solve some sort of problem with a piece in progress.

I also continued brainstorming on my large, upcoming celestial quilt. Made a lot of notes about the different techniques I want to use and how to use them best. Then in the afternoon I started working on my new project for a show coming up in Ohio. I'll post more about those 6 small pieces tomorrow. Just one hint, though. Think: tribal cats. Intrigued?

Tuesday, April 28, 2009

GSA T shirts


A couple of weeks ago I went in to my son's high school to help out with a T-shirt creation activity. Ed, my oldest (in the top photo), is a member of the GSA (Gay Straight Alliance) and the kids wanted to make t-shirts to wear at the (then) upcoming Day of Silence (which was April 17) . Mr. Friend, Ed's English teacher and the faculty advisor for the club, passed on the word that he needed some assistance. Being a crafty person, and a proud mom, I was happy to volunteer to bring in some of my supplies and get the activity going. We used Shiva Paintstiks and Sharpie markers and everyone brainstormed and came up with their own idea. If you haven't used Shiva Paintstiks before, they are pretty cool. They are oil based "crayons" that can be applied directly to many different surfaces, including fabrics, for either a thick effect or brushed on for a feathery or lighter effect. After drying and heat setting, the pigment is permanent and can go through the laundry. So many possibilities! See a super tutorial at Rebecca Reasons Edwards' awesome blog (gee, I wish I had written that!) http://mybrainonquilts.blogspot.com/2008/01/shiva-paintstik-tutorial.html All of the students really got into the activity and produced unique and awesome shirts which were proudly worn on the Day of Silence. Way to go Oviedo GSA!!

For more info about the national Day of Silence which is organized by students in support of students, see their website at http://www.dayofsilence.org/index.cfm

Saturday, April 25, 2009

Another paper foundation quilt

I forgot to add one of my favorite quilts yesterday when I posted about paper foundation piecing. All of the (stylized) mountains were done on a paper foundation. Its a little hard to tell here with this small pic but there are no truly straight lines in this quilt-I sewed down all of those triangular mountains in gentle curves, ironed them flat, then sewed new seams to take up the wrinkles that I had produced.

See the story behind this quilt (and why I have a Baba Yaga link in my favorite links box) at my art website: http://www.elizabeth-harris.com/Pages/G_Landscape.html

BTW--don't forget, you can click on any image that I have posted and a larger version will pop up allowing you to see more details. Naturally, these photos are copyrighted by me--please don't download them or use them online without my permission.

Friday, April 24, 2009

I love paper (foundation) piecing

After sending in two, count'em TWO, entries to shows this week, I was able to spend all day in my studio today. I feel so accomplished! I was putting some time in on 2 works in progress. Both have been in the works for quite some time--I am too coy to say how long, exactly. The first is a watery background that I am paper piecing in long strips. That means I am actually sewing down fabric (strips in this case) to the back of tracing paper that I have marked with a pattern. It sounds like a silly thing to do but its the easy and foolproof way to get perfect points, especially for triangles. Its a technique that can be very finicky and precise as can be seen in here in my "Stars (too many triangles)"


Whew! When you are done sewing all of the fabric bits and attaching the blocks to each other, you then get to pick out the paper. Usually, that takes an hour or so, but in this quilt, it took me a week. I decided to try to count the number of triangles after I was done and gave up after my calculations exceeded a thousand. Gack! Too many!


Of course, paper piecing doesn't have to be ridiculously tedious and tight and controlled. You can also play around with paper piecing and play it loose. Here is a quilt I made a while back that only has tightly controlled squares, the strips inside the squares are willy-nilly. The paper foundation keeps the squares uniform. Without that backing, the fabric strips would stretch every which way (many are on a bias) and it would be a nightmare to try and hitch them up.


Today, I worked on a blue strip for another underwater piece. It will be a rather long vertical format to really suggest the deepest depths of the ocean. I want the background to have subtle sparkle of the deep blue fabrics I love. Here's my first strip hanging on the door of one of my storage cabinets. Next to the finished strip are the remaining foundations I need to sew! Whew! I've got a ways to go!


I've started on my strip here. Several pieces of fabric have been sewn down and ironed flat. It looks pretty random at this level but when all of the strip (8 or 9 total) are attached it should look pretty cool.


Here I am actually sewing down a piece of fabric onto the previous fabric all attached to the paper foundation.


This is what it looks like from the paper side. The seam line perforates the tracing paper so that it is relatively easy to just zip it off when you are done.


Now, I'm trimming the strips down to 1/4 inch of my marked lines. Later, when I attach the strips to each other I will use those pencil lines as a seam guide and just sew right down them (after aligning the edges).
A neat technique, yes?

Tuesday, April 21, 2009

Little Red Writing Hood

On Thursday, April 2nd, I posted about my daughter's lovely bear puppet. Well, last Friday I was able to go to Fiona's school and enjoy the actual play that featured Henry Bear. And a fine piece of performance art it was! Mrs. Zakrzewski and her 4th grade class had created an awesome puppet theater in the front of their classroom complete with a castle background. The play was a fractured fairy tale with characters from Goldilocks and the 3 bears, Little Miss Muffet, Cinderella, Red Riding Hood, Little Bo Peep and some extras all combined in a glorious mish-mash. The following are a few of my best pictures. I hope you enjoy them!

Here is Little Miss Muffet (Melissa) complaining to Red Riding Hood (Elsa) about that dang spider.

Later, Goldilocks turns into a bear herself while the 3 bears (recognize Henry, the father Bear on the far left??) look on. From left to right: Father Bear (Fiona), Mother Bear (Zariah), Baby Bear (Marlee), Goldilocks (Julia), Red Riding Hood (Elsa).

After a lot of radical revisionary action, things really fall apart so the FBI (Fairytale Believers Incorporated) on the left step in to fix things. At this point I was wondering why the Blues Brothers were showing up in a fairy tale. Luckily it was all explained to me later. From left to right: FBI #1 (Stephen), FBI #2 (J.J.), LRR Hood (Elsa), Father Bear (Fiona), Mother Bear (Zariah), Little Bo Peep (Emma), Little Miss Muffet (Melissa).

See? Don't they look like the Blues Brothers? From left to right: FBI #1 (Stephen), FBI #3 (Zac), LRR Hood (Elsa), and slightly cut off, the wolf (Eddie).

And the show is over and the brilliant performers reveal themselves, are introduced and take some well-deserved bows. From left to right: Elsa, Zariah, Fiona, Jaimie standing up and Melissa kneeling below.

From left to right: Elsa Julia, Fiona, Emma, Eddie, Melissa.

From left to right: Heriberto and Zac, Elsa, Fiona above and Julia below, Emma, Melissa, Johnny.

It was a great performance! From left to right: Elsa, Fiona, Julia, Emma, Marlee. Thanks Mrs. Zakrzewski and class!! clap, clap, clap, clap! And a special thanks to Fiona for helping me with names, characters and plot details.

Monday, April 20, 2009

Textile Postcards


So, I mentioned postcards a post ago and promised to show some. I always keep some scrap fabric on the side when I'm creating so that I can quickly try out a decorative stitch or thread color or quilting pattern. These scraps often turn out looking pretty cool so I have started turning them into 4" x 6" fabric postcards. I use a stiff batting called TimTex and add a white backing. And, yes, they do go through the mail. The postal workers squint and frown a little when presented with a textile postcard (its quite amusing, actually). Then they measure it to be sure its the right size. You do have to use some extra postage compared to a normal postcard and they do have to be hand-stamped. But then, off they go! What a cool surprise to send someone!

BTW, the fanciful sea cucumber (well, my my idea of such) in the next to last position will be entered in the Cordova, AK Fish Follies show. Check out their past shows at: http://www.cordovamuseum.org/

Friday, April 17, 2009

Urban photographs with a nod to Jenny Holzer and her Truisms


This stop sign is in the parking lot next to our local Border's. I guess the Oviedo literati had an existential crisis as they were leaving.


I happened to notice this graffiti (stealth?) spray-painted on one of the concrete islands at a gas station I frequent. Of the 4 islands, mine was the only one graced with a statement (I felt so lucky). In case you have trouble making it out, it says: "Strangle art in its infancy and society will be a better place." !!
I especially like the random blobs of gum.

Remember, I did not create either of these--I just came across them and documented them as is.

Tuesday, April 14, 2009

A grand new acquisition!


I'm so pleased with my new purchase. Last Friday we went to the Baldwin Park area of Orlando to check out their first "Art Stroll". Artists were outside at tables and there were dance performances and live music. Fun! We checked out the art, strolled, browsed the shops, ate at a sidewalk cafe and had a lovely time. The best part was finding a vintage style post card rack at a home decorating store for only $16.25! (they were liquidating their stock) I have secretly been lusting over exactly such a thing for some time. Pottery Barn had a couple of different models last year for (of course) big bucks. Why would I possibly want such a thing?? Well, A) I think it looks way retro cool and B) it makes a great display for my fabric post cards that I make from time to time. Now I have a suitable display and can participate in some of the little local art shows exactly like Baldwin Park's Art Stroll or even Sanford's "Alive After Five." http://sanfordinfo.com/alive-after-five-updates/historic-sanford-florida--events/

I'll blog about my postcards in my next post and show some pix of already completed cards. Basically, they are 4 X 6 miniquilts and, yes, they go through the mail!

Oh--and don't forget to vote for your favorite in the Art Duel------->

Friday, April 03, 2009

And here are the Art Duel entries!!!

Be sure and vote for your favorite in the poll to the right! =========>


Artist: Elizabeth Harris
Title: Avant-garde Mouse Art
Medium: textile (mounted on mini-canvas)
Size: 3" x 3"


Artist: Edmund Quigley
Title: Side Effects from the Information Age
Medium: pen and ink on canvas
Size: 2.75" x 2"

Thursday, April 02, 2009

Small Art

So I thought I'd show the inception and progress of the small art piece I was working on for the much ballyhooed Art Duel. We are to be done with our pieces this evening and I will post the two completed works tomorrow. Then, the public will be allowed to vote on their favorite by leaving comments (either on this blog or on my or Ed's Facebook site.) After a month, we'll tally the votes and see who won!


Here is my color palette. I just love the sheen and elegance of embroidery thread, don't you? The spools all look like sleek jewels to me and I decided I wanted to translate this jewel-like feel of thread to the finished piece. Since it will be a small work, this is possible since a viewer will inevitably be peering closely. Not possible with a large piece. I know I've waxed poetical about small works and their intimacy before (see my entry for 10-31-07), so its a pleasant challenge for me to make something so small.


My idea is to embroider a piece of fabric solidly with that lovely embroidery thread leaving no fabric visible at all when I'm done. It will be all thread! Can't do that with a large format! Here is my fabric and few guidelines sketched in to help keep my embroidered lines straight.


I'm about halfway done. Looking pretty good. The lines are pretty straight--they are not machine straight, but straight enough for me. Too straight and it would look dead and lose the organic vibe. I love the communication between the color bands, especially how each looks different depending on who its neighbor is. Yummy.


Almost done now...


And now I am done. I quilted the fabric with some thin cotton batting (you can see it sticking out along the edges) and a backing fabric and made a thin mini-mini-quilt. You can see the lines of straight quilting stitches interspersed with the satin stitch embroidery bands, The original idea was to make a solid rectangle and then mount it on the 2"x3" canvas, overlapping the edges of the canvas. Glue? Staples? Something like that. But. Wasn't really working. The solidly embroidered fabric + the quilting was too stiff to fold easily over the edges. Trim the fabric exactly to size and mount it? Well, that idea doesn't grab me either...


Ok! I did what I often do when things aren't quite coming together. I chopped the fabric into strips with my rotary cutter and will arrange them on the canvas. Immediately, I see that mounting them on the plain white canvas just will not do--no pop. They have to go on a black background. I have some lovely black linen fabric that has a little bit of a sheen to it--a perfect backdrop for the thread.


Here is my black fabric under my canvas. Again, the idea is to cover the whole canvas and leave no white side edges exposed.


How to attach the black fabric? Why, with staples. After a quick hunt around the house for our large stapler that has the top that will lift up from the base, I placed 4 staples strategically. Here it is. Again, not perfectly flat with tight corners, but thats the down-size of small formats. Minor imperfections loom large. But on my second attempt at stapling the fabric I am satisfied .


The back is actually pretty neat, so that"s OK, too.


Here is the beginning of my initial arrangement. I did trim the strips even thinner to conform with the scale of the canvas. Oooo, I like this a lot. Those strips just glow against that black background, don't they? This is really the fun part. I will not be sewing these strips down; I will glue them. I would not mind the added design element of stitching but the presser foot on the sewing machine would shove the strips around too much from where I would want them.

Can you wait to see the final piece?? And Ed's piece as well? I'll post them tomorrow. Stay tuned!

Beary interesting....

Fiona had to make a Papa Bear puppet for a class project so, of course, I thought it would be cute to document her creative process too. Here is the template she was given (right) and the cardboard base.


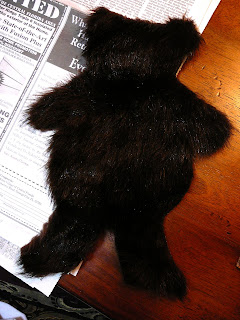
Naturally, since I save everything, I had some great fake fur in my stash. A few years ago it became a "caveman" vest for one of the boys. I had a lot left over so Fiona had no problem cutting out what she needed. Its so very beary, isn't it?


Here is the completed Papa Bear, with googly eyes, a bobble nose (remember the bobbles from the jellyfish?), a pipe cleaner mouth and spiffy bow-tie. He looks great and Fiona was well pleased. One of the best parts was having everything on hand already! Love that!