Lately, my favorite medium is paper. Specifically, old maps from atlas or foldable road maps or those large map inserts in National Geographics. I find that the map patterns are instantly recognizable as a map (iconic, really) and thus to use them as the material for a different product entirely results in a pleasant mental juxtaposition that keeps flipping back and forth in your head. "Huh?" you say? Just wait...I'll get there.

Recently, I had offered to making some thank you cards as wedding present for some dear friends of mine who will be married on the beach this coming Saturday in Key West. They wanted something: beachy/tropical/maybe palm trees, please? on the cards so recently I got to work.
At the top you can see the envelopes that I made. Each was individually cut out using a template I made, folded, then glued down. The final step is painting on the gum on the flap so that its sealable. Et, Voila! A real, live envelope!
Next, it was time to make the cards. The background was going to be a tropical sunset. Blue ocean pieces were pasted down first.

Next, a series of sunset colored strips and streaks were pasted down in random but leasing more or less horizontal layers. Golds, yellows, oranges, pinks and purples from various different map sources were utilized. An extra strip or two of blue was also added, usually ending in a blue at the bottom. I planned to put a setting sun at the bottom but that just didn't look right, so I left it out. Man, I just love doing collages.
So far, so good. I thought the sunset clouds looked pretty good, and it was a lot of fun to assemble them one after the other.

Now for the piece de resistance! I had cogitated long and hard about how to get that darn palm tree in the image. Here was my process: palms can look either really cool or very stylized and hokey. Obviously, I wanted really cool. To me, really cool = biologically accurate. Hmmm. Biologically accurate palm trees have a lot of leaves. Each leaf has a lot of leaflets. OK--cut them out of black paper? Gack! Heck no. Take, mmmmm....maybe, 10 years? Nah. Draw them free hand? Too much variation possible and take, maybe, 7 years. I had good luck dealing with
Simon's Stamps in the past so... I developed a biologically accurate image of palm trees in Photoshop until I had what I wanted, then I sent the image to Simon's and had a custom made rubber stamp manufactured to my size parameters. Here's what I ended up with--a unique palm stamp that I just love. Tell me that that is not a big-ass rubber stamp!
So then I got to the fun part of the project: stamping! Just simple black ink for the palm trees, thank you very much. Because that's exactly what color they are in front of a sunset, don't you know. And the palm tree shape is instantly recognizable too. (yeah, I know, I said that about the maps too, didn't I?)

And my last picture is a close-up of one of the cards. Obviously they are all unique as far as the background is concerned. Each stamp turned out a little different too. I also had to do a little touching up with a black marker as the ink image did not lay down at the paper piece edges. But that was fun and quick job, too. Overall, there's a nice continuity. Very satisfying to see all of them together.
Ok. Juxtaposition time. :)
Look at the bottom picture. Blur your eyes a little. Focus on the background only--its made of maps and countries and oceans and roads, right? Now, focus on the foreground/palm trees. My, those are nice palm trees aren't they? Background becomes gloriously garish clouds that you would see any day of the week at sunset here in lovely Florida. Not maps any more at all. But wait, they are maps! See? look closely! and..
Boo yah! Mental juxtaposition!
:D
 Recently, I succumbed to the washi tape craze. I have held myself in check because I can plainly see that these addictive lovely little tape rolls could easily take over. So...washi tape, cigar boxes and a little cruising on the interwebs for inspiration and a new project is born!
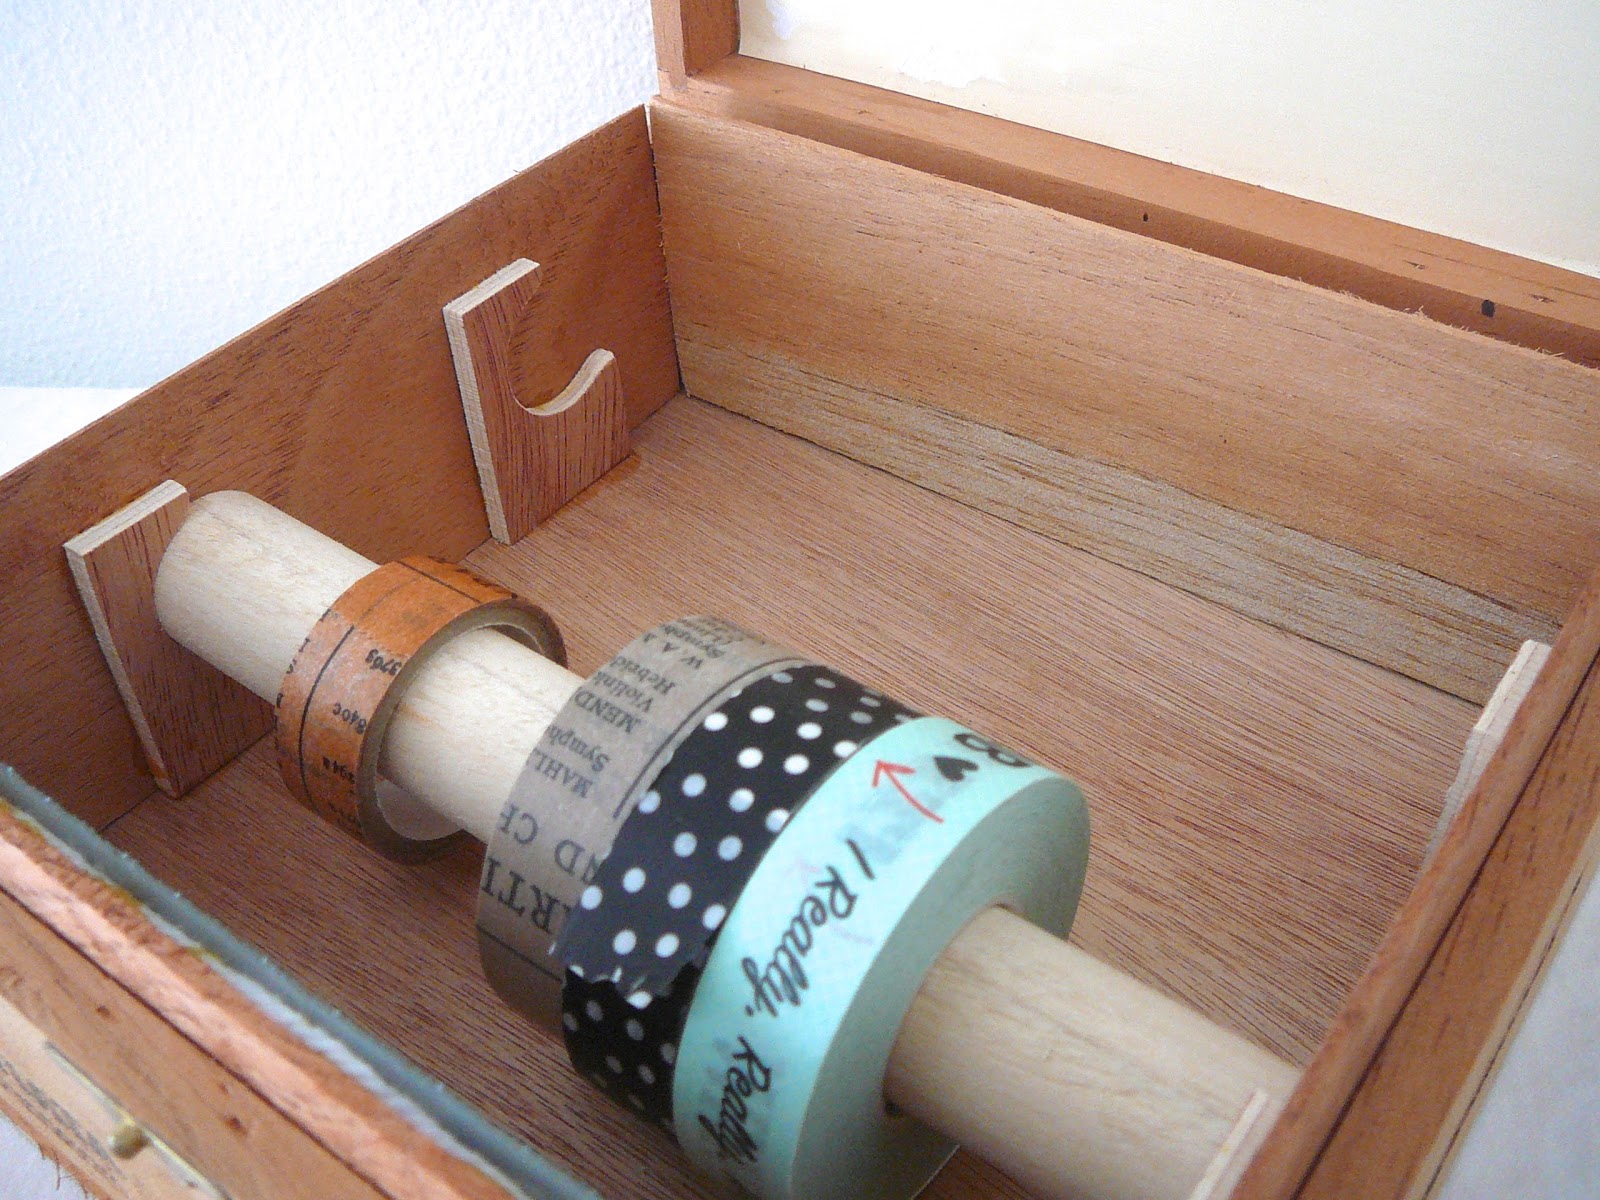
 Next, he cut and sanded down my dowel rods so that they fit inside each box. The interesting thing about cigar boxes is that they all are unique in size and dimensions. Even those that are for the same type of cigar have some fluctuations. I love that--machine made/computerized precision is death to the organic beauty and individuality of crafts, especially wooden ones.