Wednesday, February 22, 2012

T-shirt yarn tutorial

I promised to post my tutorial on T-shirt yarn production and so here it is. There are other tutorials out there that are just fine too, but this is my own take on the process, combining a few steps here and there to get the most yarn out of each and every T-shirt.

Start with....a T-shirt (you saw that coming, right?). Any T-shirt will do, from toddler size to men's XXXL. Obviously, you will get more yarn out of the latter.

Here's my T-shirt du jour, thanks to the my sister who cleaned out her closet and sent me a bunch of T-shirts--(thanks, Sissy!).  I have cut off the bottom hem and cut across from one armpit to the other, leaving a big tube at the right.


Cut 1 inch wide strips from the bottom to the top, leaving the strips attached by a couple of inches at the top. Exact measurements are not necessary.


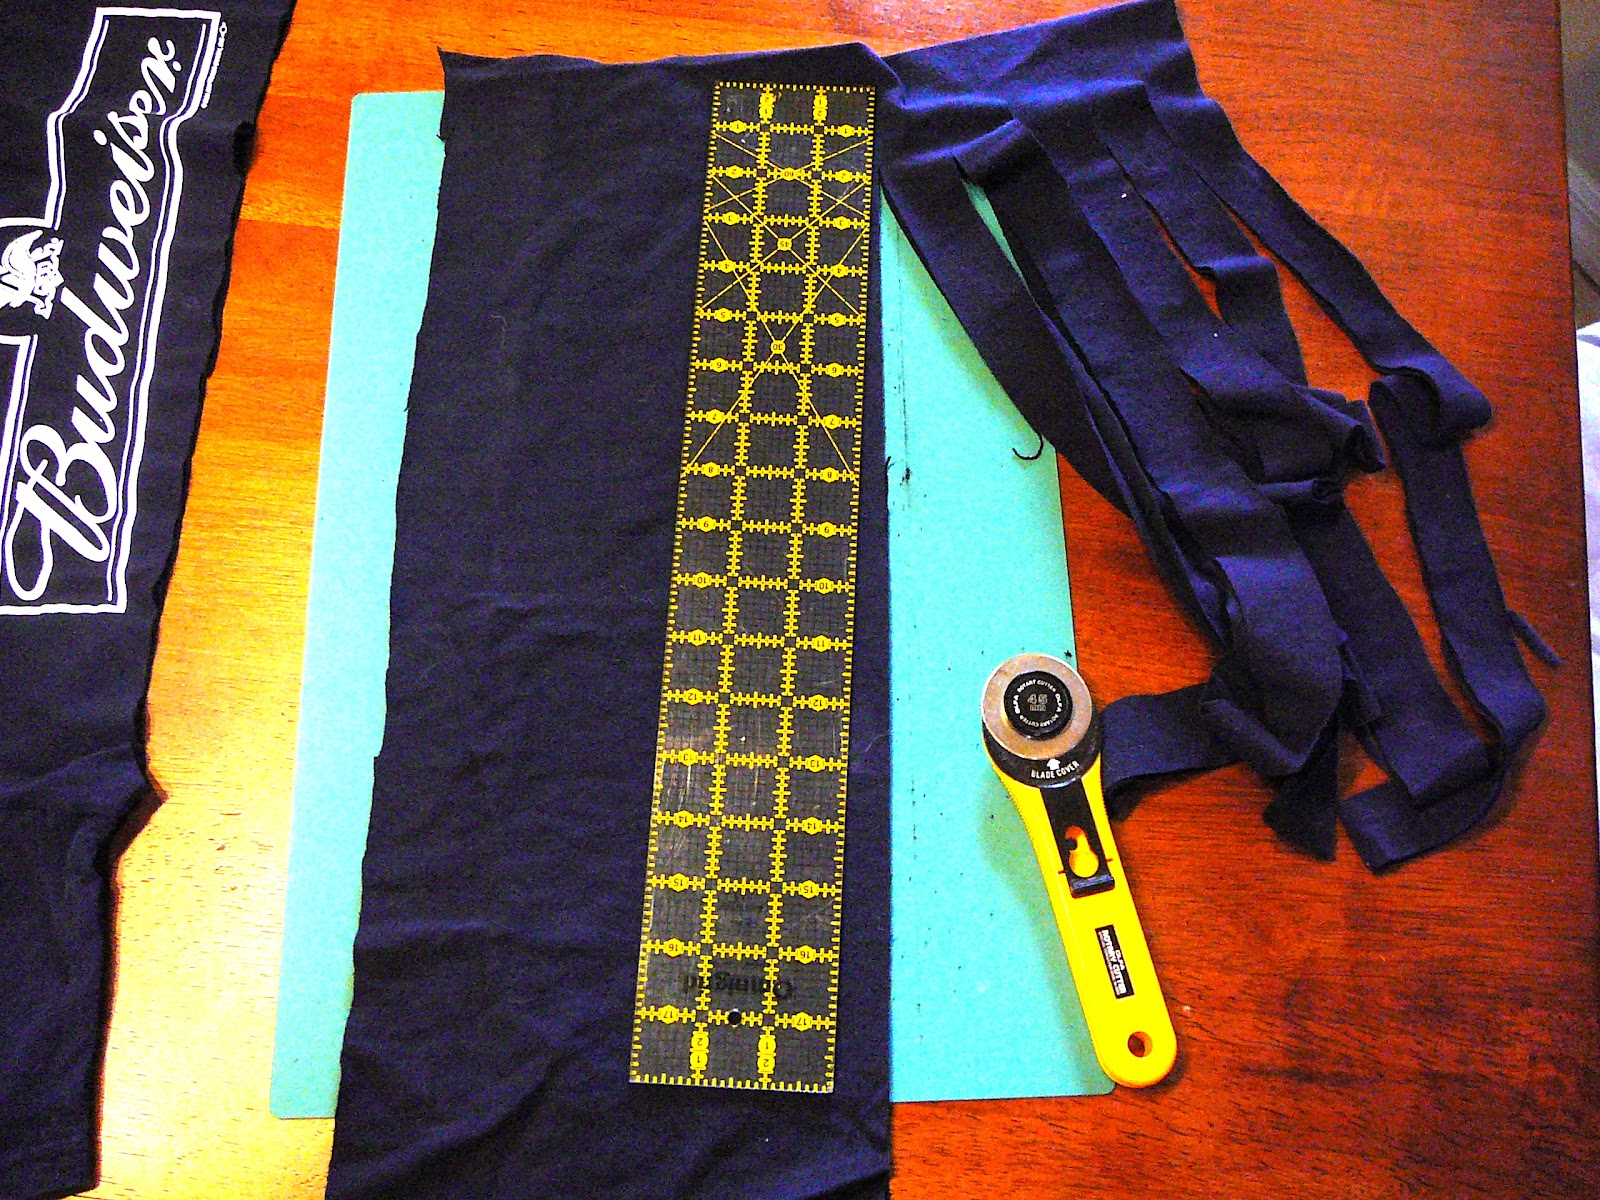
That's a lot of strips to cut by hand so a faster method is to use a rotary cutter. Either way works but the rotary cutter is faster and easier on your hands (if you're prone to arthritis or other hand stiffness).


And here is my completely cut tube. Not to worry about the ragged edges of the hand cut strips on the right--all of that will disappear.


Now, unfold the uncut edge and spread out the strips top and bottom. Hold on to your hats--here comes the magic part!


Start cutting from the outside edge at the beginning of the joined section and continue cutting inwards on a slant to the first cut.


Now jump up one strip and make a cut parallel to your initial one, hopping up to the next strip each time as you go. So instead of cutting individual T-shirt rings, you are making one glorious spiral!  Don't worry if that part looks uneven or more slanted than the rest of the strip, it will all even out. Keep on doing this to all of the strips until you get to the last one.


Here is the end of the line! Make the last cut on a slant to the outer edge and you are done with this stage.

If you want perfectly smooth yarn, stop here--many folks do. Personally, I feel like there is still a lot of T-shirt left to harvest so I continue on with the sleeves and the neck and attach those to main segment created here. I'll show you how to attach the 3 additional pieces without any messy and lumpy knots, too.

I'm having trouble posting additional pictures so I'll finish the process in another post tomorrow. Stay tuned!


Tuesday, February 14, 2012

Knitted rugs revisted

Remember when I first started messing about with t-shirt yarn? I made a few bath mats by crocheting ovals and a circle and was not too thrilled (I'm just not a great crocheter). Then I knit a trivit  (turned out ok) and tried knitting a bath mat but the thing was so ugly I ripped it all out again. I decided that the time had not yet come and, more importantly, the pattern had not yet been discovered that would yield the optimum results.

Well, glory be, I found that magical perfect pattern and spent a happy happy weekend cutting up t-shirts and knitting. The pattern actually calls for a cut up king size flat sheet for the yarn but I knew that t-shirt yarn would work (and I think work even better). You can download the free pattern here. This pattern is worked on flat needles but through the magic of short rows makes a semi-circular or circular rug. Here you can see I'm about halfway done. You work this pattern wedge by wedge and the pointy edging
is worked along at the same time.  A very well thought out pattern indeed!

And here's a detail of one of the edges. I knit this on my biggest needles that I had (17) and that made a nice and thick and cushy texture. Very soft to stand on. I'm pretty sure if you made this out of sheet strips that that would not be the case.

And here is the finished mat--SO cool. I'm moving in April so I think I will save this for my new master bath. I may have to make another 2 or three as well as gifts and such.

As you can see, it takes six wedges to make a mat. I used approximately one adult t-shirt for each wedge. 12 wedges would make a full circle.

I'm starting on a blue one as a gift for  a neighbor next--so fun.

I'll try to remember to post a tutorial on cutting up t-shirts the quickest and most thorough way soon. Craft stores and various etsy folks have started to sell the stuff (a little pricey), but heck, you can easily make it yourself for free!

Wednesday, February 08, 2012

Pendents and cabinets

I'v been a busy little bee in all sorts of arenas lately so here are some more finished projects! I'm always so happy when I can talk about finished pieces because I have so many (ahem) unfinished ones floating around. I have to work very hard at not feeling guilty about that (a wasted stupid emotion) and instead let each piece progress and grow at its own pace. Or something. I just wish some pieces (and you know who you are!) wouldn't take years to incubate. [see how I did that? its not my fault I have a bejillion projects underway]

Here's the latest in my cigar box cabinets. Note the beautiful woods used on the boxes. Gosh, they sure are pretty. No cigar box labels for these lovelies! The logos are simply burned or imprinted into the wood and stained. Notice the dove tailing on the edges? So nice.

This time I used very small and demure knobs to help me grasp each box and pull it out from its shelf. You hardly even notice them, huh?


And here's a picture of all of the cabinets I've made so far nestled all up together all snug and friendly in my studio. They look happy I think.


Should I make some more? I do have a few more boxes. Well, we'll see.


But as I mentioned in the last post, this past week has been all about domino pendents. Yesterday I finished 8 more. Fiona, my daughter, ran off with one of them, so here are the remaining 7.

This batch turned out better than the first two as far as the surface sealer was concerned. I don't know what I did differently but the sealer dried crystal clear and was perfect. I used a mixture of different images: another Frida Kahlo portrait, 3 Tarot cards from the Major Arcana, 2 screen shots from Pocket Frogs (my current fav iPhone game) and even a close up from one of my quilts.

And now I truly do have the whole process ironed out and the whole thing is a breeze to complete.

Monday, February 06, 2012

Domino Pendents

Currently, I've been enjoying making some more jewelry from recycled materials. I had pinned several tutorials for pendents using a base of Scrabble tiles on my Pinterest boards but they all struck me as being rather smallish. So when I saw the same technique depicted with a domino tile instead I was much more interested. And it just so happens that we had a vintage set of 'em laying around the house that no-one much bothered with. So with a little shopping for the sealer and the hardware, I was in business. Here are my first two efforts made from materials that I mostly already had.

 A book of stickers of Frida Kahlo's artwork supplied the image for the first piece and it was easy to choose an appropriately sized sticker for the domino. The second one features a word trimmed from one of those vintage cigar box labels I found on Ebay a month ago.

Ebay came to the rescue again for the findings: the small silver tone screw eye and the Bali style bail. Seriously, I think you can find just about anything on Ebay.

Of course, almost every new project type necessitates  at least one trip to Home Depot and this was no exception: the insanely small screw eyes that hold the bail (loopy thing) were not large or strong enough to just screw into the wood (which is, of course, ebony) so I needed to drill a hole. A tiny, tiny hole. So a new universal chuck and a mini drill bit set for the dremel tool we already owned was in order. Sigh. So much for a cheap project.

That's OK. I'm all set now and have another 8 in the works! So stay tuned, I'll post them soon.

Sunday, February 05, 2012

Pizza extravaganza

Its been a couple of weeks and I have lots of goodies saved up for posting. But I'll spread them out a little over the next couple of days. So check back, ok?

I haven't posted about any food items in a long time so I think its definitely time to get those taste buds tingling. No sweets today, but some lovely home-made pizzas. Those of you who know me in real life, may remember that many long years ago I put myself through school working in a variety of pizza joints. So I appreciate a good pizza and really looove a great one. We've had a few delivery pizzas lately and they've been OK (except when I accidentally ordered some bizarro combination one time when I was just a little bit tiddly. OK, maybe more than a just little bit, but that's why I was staying home and not driving anywhere, wasn't it?). But I remembered to pick up some shells at the store finally and came up with these three gems. All were terrific and I will endeavor to replicate them again soon.


Fiona had:
Tomato sauce + herbs + shredded mozzarella + mini (turkey) pepperoni + sliced black olives

A simple, yet elegant pizza.


Ed had his favorite, a Hawaiian combo:
Tomato sauce + herbs + shredded mozzarella + chopped canadian ham + mini (turkey) pepperoni + carmelized white onions + roasted and deskinned red bell peppers + crushed pineapple.

He liked it but I didn't get enough pineapple on it for his taste. I 'll be sure to load it up next time. I think I'll buy chunks rather than the crushed next time too. At the table, he also generously added anchovies. :/  I had balked at putting them on, but he really wanted them. To each his own! But overall, a success nonetheless.

And I'm saving the best for last! Here's my delectable veggie  pizza on a nice thin and crispy crust:

Tomato sauce + herbs + shredded mozzarella + sliced fresh mozzarella + carmelized white onions + roasted and deskinned red bell peppers + sauteed portabello mushrooms + pickled artichoke heart wedges. Oh my. It was soo good. Nothing like delivery at all.
And the leftovers were even better the next day, too!