 Well, it almost never happens, but this year's original Christmas card was a failure. :( I liked the design and the finished card looked pretty darn good but production of 60 cards was just not to be.
See how nice they turned out?
sigh
Unfortunately, all of that lovely fine glitter clogged up the acetate stencil that I had cut and it became a constant battle of cleaning out the stencil every second or third spraying. If I didn't do it that often the glitter started filling in the narrow lines of the letters, dammit. So I did that, starting to grumble. But then when the stencil started to break/tear at some of the narrow places, I saw the handwriting on the wall.
It was just not going to happen. 20 cards? yeah, I would have toughed it out. But 60? no way.
Time to regroup. Remember: "its not a mistake, its a design opportunity". Right? Right!
 Ok. Well, I already had a stack of pre-sprayed background cards so it had to involve them. I did not wish to go back to the drawing board and spend an excessive amount of time conceptualizing so I (guiltily) rehashed a designed from a few years ago with a textured paper star. An added plus: I still had some of that textured paper and was happy to use it up.
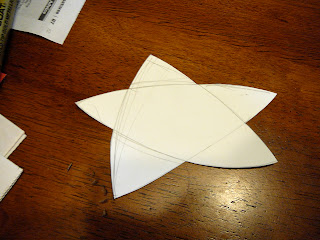
Here's my nice fat star template--I like him!
And here is my stack of textured stars. You can barely make it out, but they, too, have been sprayed with the gold glitter spray from Lowe's. Holding the spray can at a sharp angle while spraying allowed the glitter to get in the closer crevasses and not in the away crevasses, making for a nice effect. (You'll have to take my word for it; I know it doesn't really show up here).
A sheet of foam that I had saved from some shipment or other gave its life to make some little rectangles.
(extra points for recycling and keeping a piece foam out of the landfill)
And then out comes the glue gun and attaches all of that foam to the stars....
and then the stars to the cards!
And that is it. Whew--I'm done. Crisis averted. Yay!
Time to start addressing those cards now...


No comments:
Post a Comment