Wednesday, April 13, 2011

Universe Box


Did I tell you I love felt? Well, I do. So here's some more felt fun (although it may not look it at first glance.) A while back I made this cute little fabric (and felt!) covered box. I stiffened it with a wonderful product called Timtex  Timtex Interfacing Craft Pack. Its a very stiff synthetic interfacing that can still be sewn and ironed. Think of it as a sewable cardboard, if you will. I keep it on hand for any quilting projects that need a stiffer batting (points that stand out etc.)

I made this box with a removable lid and sewed a celestial fabric cover for it. I wanted a little surprise on the inside so I lined it with bright yellow felt (ah...there's the felt connection!). I call it my "Universe Box".

When all of the parts were assembled, I blanket stitched it all together with a gold lurex thread. There are metallic gold highlights in the fabric so I thought that tied it all together.


On a related note, I went to my local book store yesterday and guess what cried out to me from the shelf? You guessed it-- a felt project book. Ooooo, I'm so excited to try out one of the projects. Its called Big Little Felt Universe: Sew It, Stuff It, Squeeze It, Fun! by Jeanette Lim. Just check out the apple on the cover! So cool. Can't wait to try something out! This lady is a true felt artist--check out her etsy shop that features her incredible creations (and patterns) at: http://www.etsy.com/shop/umecrafts.

I'm only sorry I have to go to work today. :(


Monday, April 11, 2011

Et voila!!--Ikea pillow done!

Whew! Still playing catch-up with my pix. I finished my pillow about a month ago so....here's that pesky Ikea pillow all finished at last! And what have I learned? Cylinders are a bitch. My advice? Think twice before you start one--way more complicated than it looks.
That said, I am happy with it and glad I made the cover but its pretty unlikely that I'll make another one to match my other sheets.

Sunday, April 10, 2011

Feltastic

I think felt is a drastically underused textile--I've used it in the past and really enjoyed its qualities. A couple of days ago I came across a great project on another blog: not martha http://www.notmartha.org/. OMG! A beautiful felt flower pin--right up my alley. I'm not going to post a tutorial since Megan already did an excellent job of that; do be sure to visit her blog and check it out. Here are the lovely results...

I made two of these pretty felt flower pins so far and have another under construction. Each petal is made individually and is sewn down to a felt covered base of cardboard.

I think they look a little sun-like, don't you?
Fiona, my daughter, came home from a party and fell in love with the red one so I gave it to her. She plans on wearing it to school tomorrow.

Now I'm thinking about how to make other flowers besides dahlias.  Or maybe some embellishment. Or different sizes? With a leaf or two?  Hmmmmm--the possibilities are endless!

Friday, April 08, 2011

Christmas cards leftovers

I was scanning the archives today and realized that I never posted the 2010 Christmas cards. Shame on me! So without any further ado, here they are. 2010's cards featured some filamentous yarn and some heavy textured paper from a gift bag. I started with a large hole punch....


Isn't it great? I'm pretty good at cutting things out but there's no way I can cut a perfect, smooth circle. This punch (from Michaels, or see the one here: Uchida LV-SJCP40 Clever Lever Super Jumbo Craft Punch, 2-Inch Circle) takes care of that issue in a snap,


A gift bag was sacrificed to yield these beautiful circles in a red metallic paper with an alligator texture finish. Very eye-catching!


Here's my tree branch made out of that filamentous yarn (a swipe of glue stick Avery Glue Stic, 0.26 oz, Pack of 6, (98095) holds it down) and the ornament I punched out. I've adhered my ornament with a raised adhesive stickers.


And I couldn't forget the little thingamabob on top of every ornament!  So I covered a sticky dot with aluminum foil, shaped it a bit and then stuck it into place.


Not bad! I really like the dimensional aspect of the ornament and the yarn. Silver ink was drawn in to indicate the ornament's hook. And then they were all signed at the bottom as usual.


Unfortunately I ran out of the green yarn so a few cards went out with iridescent white branches. (uh, snowy, right??!)


Then that ran out too and some post-modern versions went out with purple branches and gold ornaments (kind of an LSU theme).  So much for Christmas 2010! Wonder what the 2011 cards will be? hmmm

Tuesday, March 29, 2011

Thanksgiving (cupcake) leftovers!

Sorting through my pictures today (while watching Cupcake Wars on tv; love that show) and came across this gem that I had meant to post last Thanksgiving. This lovely cupcake (!) was made for my son Ed by his girlfriend, Mariah. Isn't it incredible? And edible! And delicious! Or at least, so said Ed. I only got to photo-document it. Ah well, I appreciate the feast for the eyes that it continues to be.

Wall treatments

Hi all,
I know, I know--its been a loooong time. My apologies. That's what happens when you get divorced and start working full-time! Gack! But here's a new post dealing with wall treatments.

Like many folks, I have painted walls and even dabbled a bit in some so-called "faux" finishes. It can be lots of fun. Be not afraid! Get a good reference book--I particularly liked Sunset's guide Decorative Paint & Faux Finishes--read up and go to it! Don't be afraid to try new techniques. And don't be afraid to paint right over them if they don't work. (For that reason, I stay away from textured treatments; much harder to cover up a mistake.)
Here's my first wall treatment. We painted our living room a deep gold color and had a lot of gold accents in the room. So I though a metallic gold would be appropriate on the walls too. The crown molding got painted with a flat yellow latex and then was streaked with a metallic gold paint and a simple stencil was applied as a border directly underneath all around the room. I thought it turned out handsomely.


 Here is the wall at a higher magnification. I loved the look of the gold stencil paint so much that I did an all over gold stencil in the dining room next door. You can just make it out through the doorway. It took me quite a while to go around and do the whole room but it was worth it (and covered up the flaws in the drywall, to boot.)
In this dining room wall, I did a fairly complex faux finish and then completed the look with star stencils. I started with a layer of orange paint (pumpkin orange!) and then mixed a deep red paint half and half with some glaze. I then dry-brushed the thin red paint over the orange. It took three layers to get the effect I wanted. Then I applied hundreds of star stencils in gold, dense at the top and falling down and thinning out at the bottom. 

For all of the stenciling I used Delta Stencil creme oil paint Delta Stencil Magic Paint Creme Folk Colors Traditional--it was very easy to work with and gave great results. Love, love, love, the metallic gold especially.


Sunday, September 19, 2010

Gyotaku T-shirts


I was cleaning out and poking around in my studio yesterday and came across this project: some Gyotaku t-shirts I did with Fiona's kindergarten class a few years ago. Gyotaku is a Japanese technique for making prints or rubbings from fish. Its a traditional craft and very beautiful. Usually its done by inking a fish or sea creature and then pressing or rubbing paper on top.

I adapted this method for the kindergartners as a class project. They needed shirts depicting red fish since they were doing a production of Swimmy. Swimmy (Knopf Children's Paperbacks) I started by experimenting a little and ended up using acrylic paint brushed onto a fish and then rubbing a shirt on top of the fish.

Turned out very well!  This is a trial run shirt, The shirt the kids did had just a single fish. Aren't the details of the fish great? Using acrylic paint was perfect. Easy to work with and clean up. After the print was completely dried on the shirt (24 hours), I heat set it with a dry iron. After that, the shirt was safe to wash in cold water with no running or fading.

I may have to do this again soon--it was a lot of fun!

Wednesday, August 25, 2010

Progress

Back in the studio this weekend and got all of the quilting done! Yay!


Have to bury all of those loose ends--a tedious job. But it has to be done.


I finally got to the print stripes. I chose a light rose pink thread for the quilting.


I almost forgot that I needed 2 circles for the end pieces of that cylinder. Here's the "quilt sandwich". No fancy stripes here, just the floral print.


And here they are all quilted. Pretty simple, really.


I decided that the striped piece was just a little blah--it was missing something. The stripes weren't cohesive. So I added some decorative stitching on the boundary of each one of the stripes. A featherstitch in yellow for each one. I like it now!


And then, since I was still going for that homey, cottage look, I decided to wash the two pieces before assembling them. The cotton in the top, batting and backing all shrink up just a little, leaving a puckered, wrinkled effect. Not what I go for in my artquilts but perfect for a pillow cover. So this has been washed.


Maybe you can see the puckers a little better here. 

Next step: assembly!

Tuesday, August 03, 2010

More stripes


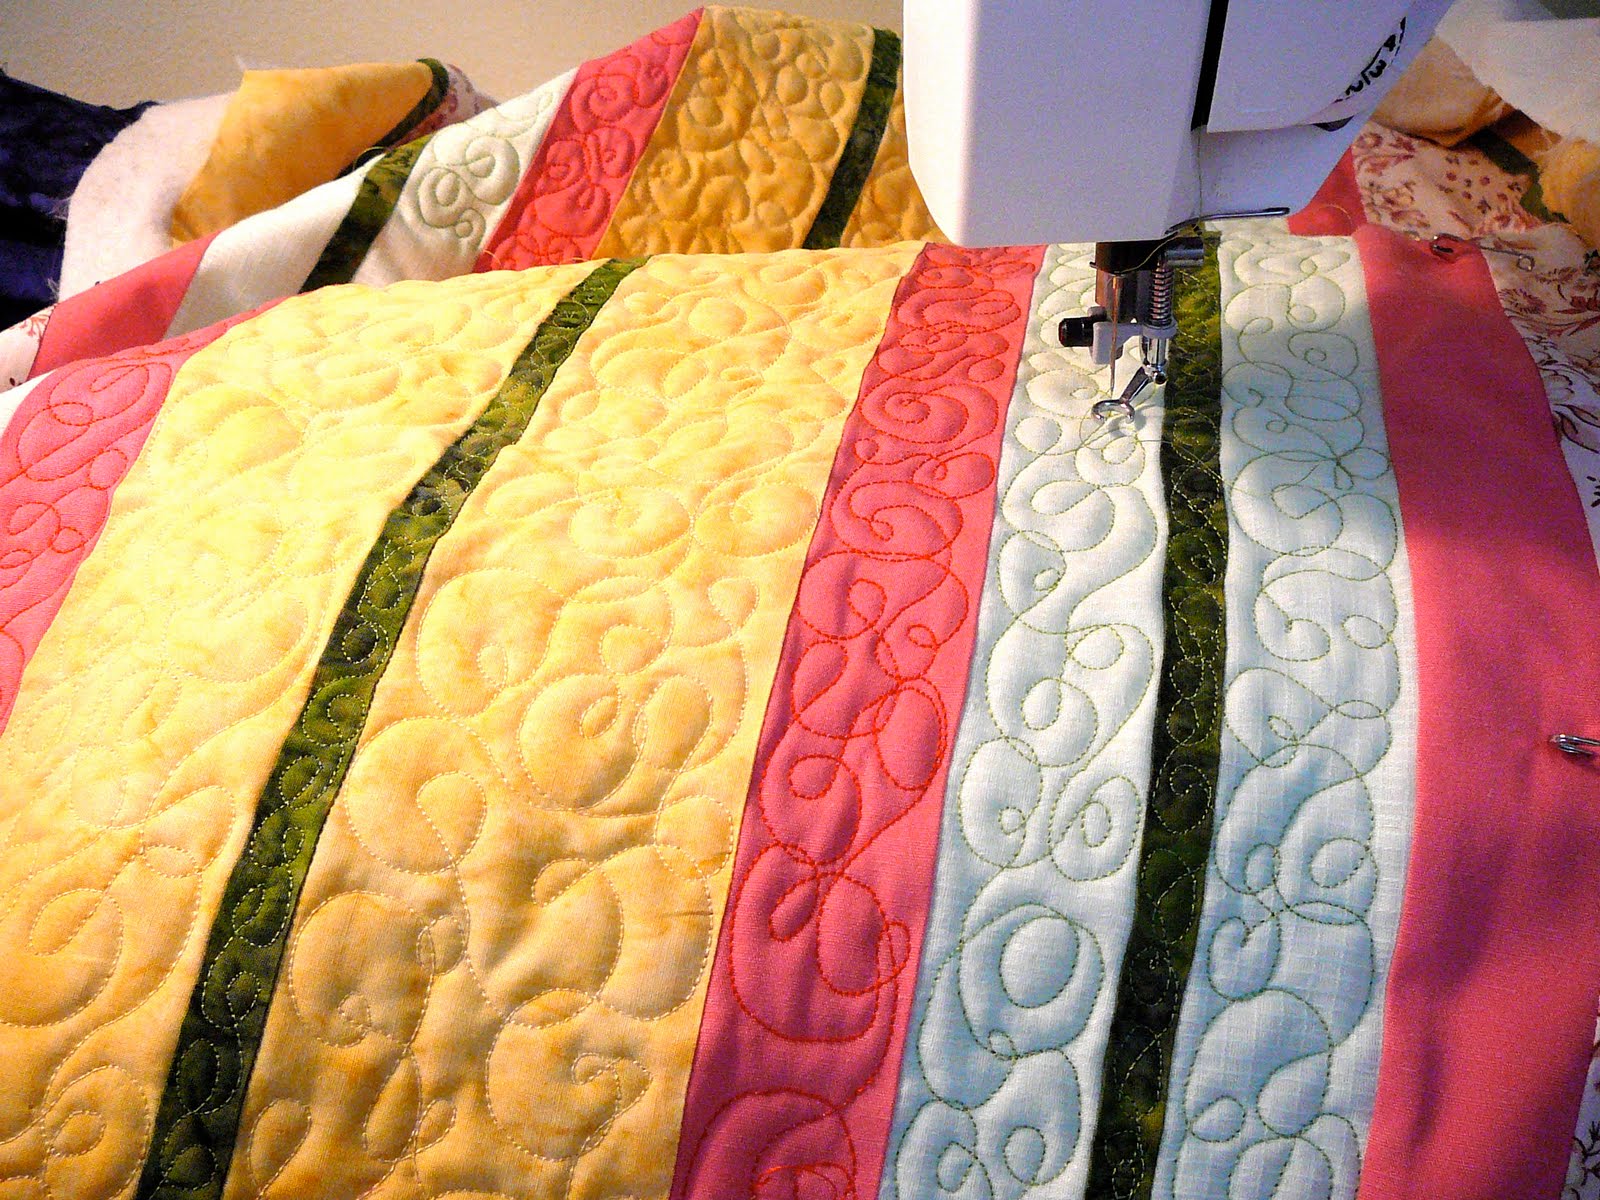
I did manage to steal a little bit of time today and managed to get a few more stripes quilted. I'm more than half way done now.


I'm including this close-up shot so that you can see the stitching details. I did use the red thread for the pink stripe to give it a more salmony color feeling overall. I think that worked, don't you? Notice the green thread that I used on the light and dark green stripes? That's the same thread on both. Interesting how the background affects the perception of the color, isn't it?

Well, that's all for today. Hopefully, I'll be done soon and can begin the pillow cover construction, Stay tuned!

Monday, August 02, 2010

A little bit of quilting


Still soooo busy with my day job, but I did get a little bit of quilting done. What's the bottom line here? Always, always always start quilting in the center and work your way outwards. Accordingly, I began in the center of a yellow strip and quilted up and then down to the outside edges. The same for the next yellow stripe. I admit I cheated on the thin green stripe as it was already pretty tacked down. So now I just need an hour or two finish up the job. Soon, I hope!

Sunday, July 25, 2010

Ikea pillow progress..


Not too much happened today with the cover, but I did get my quilt sandwich laid out and pinned. Above you can see my sandwich: pieced top, batting and backing. I laid it all out on my bed, my largest work space currently.


I hold the sandwich together with quilter's safety pins. As you can see, they have a bend in them to facilitate getting the pin in and holding all of those layers together.Quilt Safety Pin-Nickel Sz3


And here is the whole thing all pinned. Pin placement is about every 6 to 8 inches all around.


Placement is a little irregular, but this will do. All ready to quilt now. Needle is changed out on my machine, feed dogs are lowered, and its threaded with yellow embroidery thread. Now I just need a little time!

Saturday, July 24, 2010

The cylindrical Ikea pillow


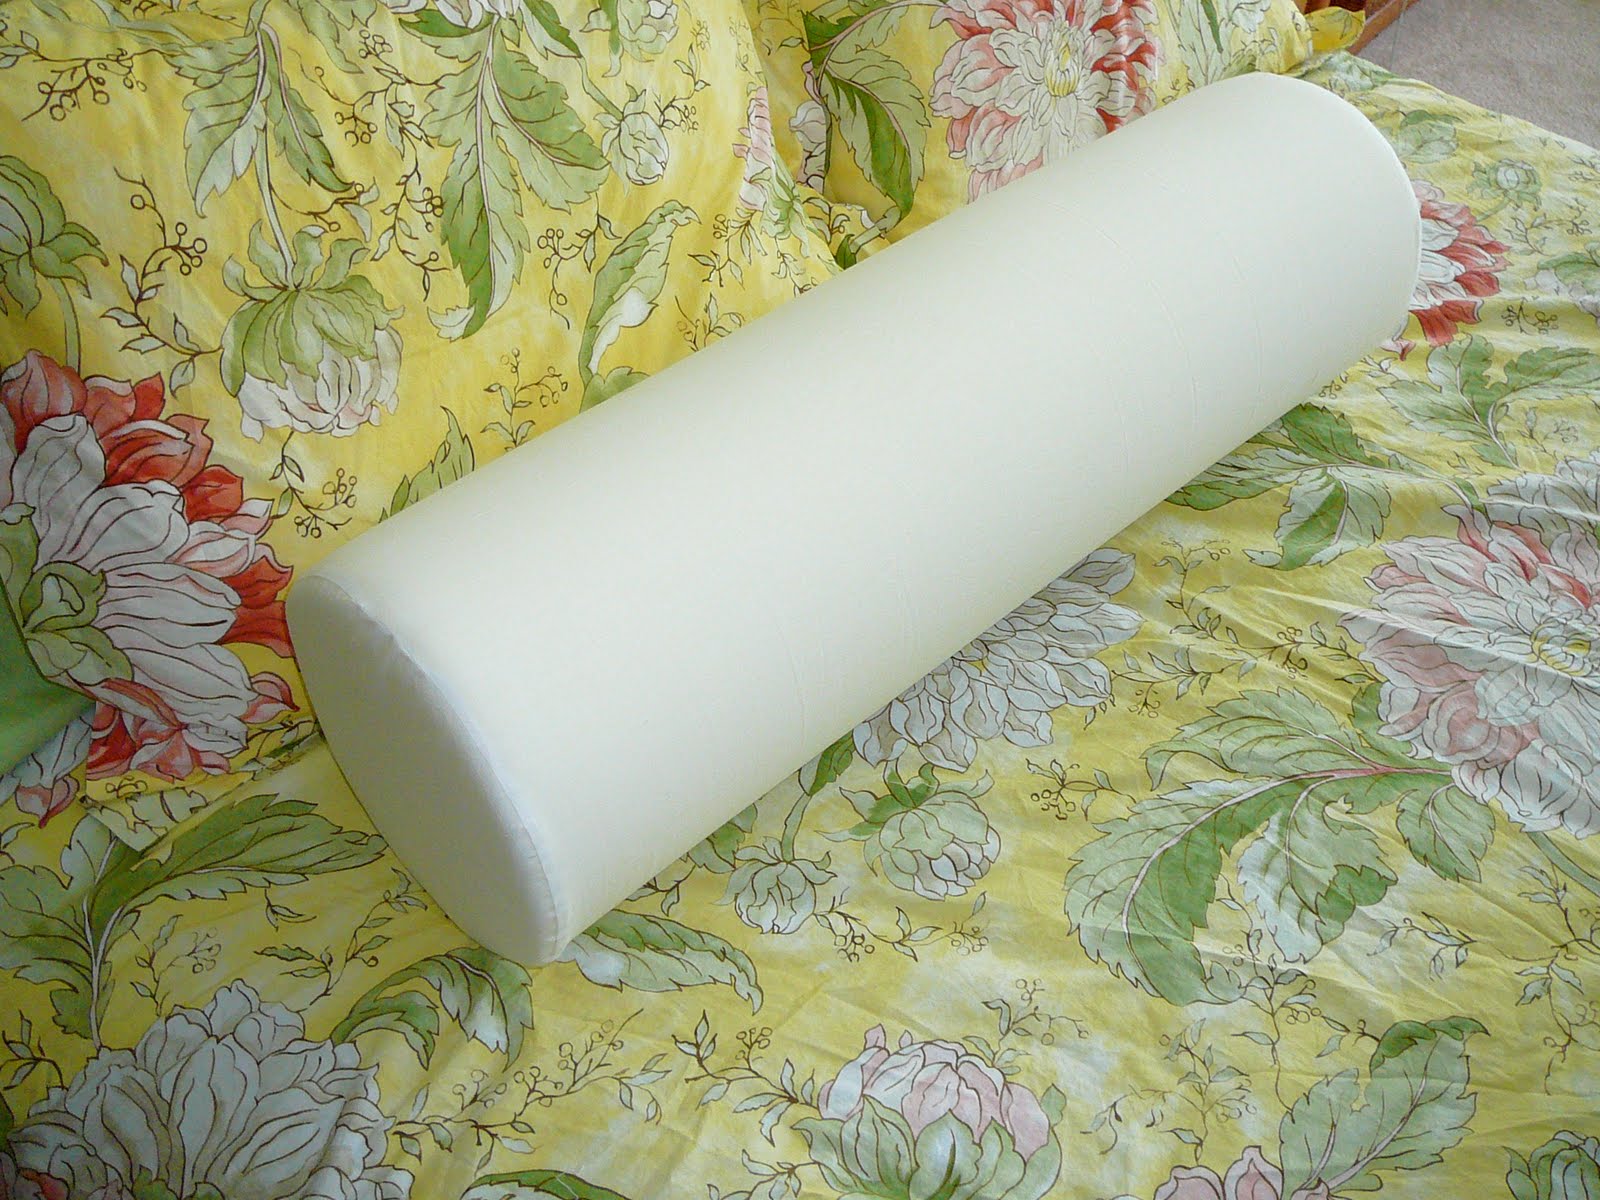
After many moons, I've stepped into my studio again to get a little home decorating sewing done. A couple of weeks ago I made a voyage to our local Ikea (looove that place: http://www.ikea.com/) and picked up several small odds and ends including a cool cylindrical pillow or bolster. A great shape and, of course being Ikea, a great price. Unfortunately, there was only one pillow case available for it which had drawstring treatments on the ends and was plain white.

Yuck to both! I knew I could do better. First I sewed an inner liner that would permanently cover the foam. It was good practice in dealing with the difficult ends. Circles stretch when you sew them so I ended up fusing some interfacing (Pellon Shir-Tailor, my absolute favorite; its easy to work with and adds just the right amount of stabilization without excess goop that accumulates on your needle) to stabilize each circle so that I could sew it to the central tube. Worked like a charm and you can see what I ended up with above.

Days were spent going through all of my fabrics. I wanted to coordinate with my new duvet cover and shams from Pottery Barn (http://www.potterybarn.com/products/laine-organic-duvet-cover-sham/?pkey=cpatterned-duvet-covers-shams) and was having a tough time choosing a single fabric from my stash. Finally I realized I had to piece something together to get the colors and effects I wanted. Here are the fabrics I came up with; each one has a story behind it.


Measurements: the pillow is 31" around. I'll add an inch on both sides and shoot for 33".


And 31.25" wide. I'll add some extra dimension there too.


Before any cutting or even sewing, the first step is always ironing. Like my Tante Elfriede, the seamstress, says: "Gut gebügelt ist halb genäht" which translates as "well ironed is half sewn" or, more loosely: "The iron is the best tailor". Well, she's soooo right.


Next, time to cut some strips. No blocks for this pillow, I decided simple strips would yield a pleasing striped effect.


And here they all are.


A pleasant afternoon was spent sewing the strips together and when they were all attached, I laid the top out on the pillow to get an idea of the final cover.


Hmmm. Not too bad! The pink is a little bright--it should really be a little more in the salmon range. I'll tone that down by using a red thread when I quilt the pink strips. All of the other color strips will be quilted with matching colors. Enough for today! Tomorrow: quilting the top.

Wednesday, May 05, 2010

Apple Tart

Hello all! don't think I haven't been thinking about posting just because I've been swept up in a bezillion responsibilities. No art updates but I think you might like this example of kitchen creativity. This is my own recipe for an awesome almond-apple tart using the olive oil dough recipe from "Artisan Bread in 5 minutes a day" by Jeff Hertzberg and Zoe Francois--one of my favorite cookbooks: Artisan Bread in 5 Minutes a Day.
First a couple of pictures:


And here is the finished tart! Delicious!

Apple Almond Tart
By Elizabeth Harris

2 eggs, one separated
1 grapefruit sized portion of olive oil yeast dough
4 Granny Smith apples, peeled, cored and sliced
1 tbsp cinnamon
1/4 tsp ground nutmeg
4 tbsp flour
2 tbsp sugar
2 tbsp lemon juice
1 tube almond paste (7 oz.)
1 8 oz pkg sliced or slivered almonds
decorative sugar (demarra or other large grained sugar)
1/8 tsp salt
PAM

Remove dough from tub and let rise for 30-40 minutes. Spray cookie sheet with PAM and dust with flour. Pat and push out dough to cover the whole sheet. Be patient, this takes a while. Be gentle so you don't tear holes in the dough as it relaxes and stretches. Peel, core and slice apples. Add lemon juice, 2 tbsp flour, sugar, cinnamon, and nutmeg to apples and stir until well coated. In a food processor combine cut up almond paste, whole egg and egg white, 2 tbsp flour, and salt. Process until well blended. Spread almond paste mixture on dough leaving an inch margin all around. Sprinkle a layer of almonds onto the paste only. Arrange apple slices in four rows on top of the paste and almonds also leaving the margin bare. Pull up the dough all around the edges over the apples. Add a little water to the remaining egg yolk and paint the surface of the dough margin. Sprinkle with more almonds and finish with decorative sugar--especially on the exposed dough. Bake at 450 degrees F for 25-35 minutes or until golden. Remove from oven, let cool on rack. Use a spatula to remove from pan--dough will have adhered somewhat despite the PAM.

Tuesday, March 02, 2010

News and updates


Hi all! Sorry for the long desert of no posts--working 3 jobs have a tendency to suck up all available time and energy! But things are under control now so I thought I'd give a quick update on my art related activities.

My recent one woman show, Disparate Threads, was AWESOME! Thanks to the Women's Research Center here at UCF! We had a lovely opening with many attendees. More folks dropped in during the 6 weeks the show was up as well. Lots of sales too--always a cause for celebration. It was so great to see many of my works up at the same time in a well-lit space appropriate for viewing. Thanks, Leslie and Fran for making it such a great experience! http://womens.research.ucf.edu/ Next up at Center is a talented sculptor and water colorist: Linda Brant. http://www.lbrant.net/home Can't wait to see her exhibit.

My hub cap art is under way--but slowly. I'm still gathering supplies and I'm hoping that once I get all of the junk, er, junque together, I will be able to whip the piece out. Meanwhile, check out LandfillArt's website which is now live: http://www.landfillart.org/Do take the time to browse the gallery of the works that have already been completed and submitted.

This past Saturday I attended the organizational meeting for a local group that will be called FOFA: Focus on Fiber Art. It was organized by Hye Shin, a fiber artist working with paper and weaving and found objects http://www.absolutearts.com/portfolios/h/hyeshin/We hope to get a viable fiber arts group going here in the Orlando area for mutual support, learning and exhibition. It was a good meeting and I look forward to the next one. Hye's pieces were very impressive--I have been thinking/cogitating about them and how well they struck me since Saturday. Some of the work she brought reminded me of my nude piece "Soft Curves" (which I have posted above). I think I may have to revisit and explore that idiom some. I really like the transparent aspect of most of the fabric--very ethereal. I think I can repeat the images but in a looser, less formal way. Hye was using a lot of gauze and very open woven linen. I liked that look a lot.
Hmmmmmm.

And last but not least I must announce that I'm almost finished with a piece called "Sowing the Blade Garden". This is another of my "Inner Landscape" or dream based series and is rather stark. I've shown images of it in progress a while back. I'm in the final quilting and finishing stages now. I'll post it when I'm done.

I'm planning some major updates to my Etsy site some time in the near future (I hope). Revamping the site, changing wording, descriptions and adding a bunch of items for sale. Several days' worth of work for sure. Of course, that is assuming that I can wrestle my laptop away from my 15 year old son.

Stay tuned!