Showing posts with label Christmas cards. Show all posts

Friday, December 07, 2012

2012 Holiday Cards

If you liked my page on Facebook, then you have already seen some of these images. But not all of them! And you certainly didn't get the full story about my creative process (and if you haven't liked my page, what are you waiting for? See what goes on in a day to day format! Click here). So read on, and see the story of the creation of my 2012 holiday cards unfold before your very eyes. :)

Well. These days I'm all about recycling and paper based collages. As I got to thinking about the theme for this year, I decided to challenge myself and craft my cards out of my recycle bin (as much as possible, anyway). Since I need to make about 70 cards, I elected to use envelopes and white card stock I already had. All of the collage materials will be recycled--woo hoo!

I really liked the horizontal strips on the palm tree cards I made recently; I think they easily translate to visual landscape. So I decided to do the same for these cards, but with a fun twist: I'm tearing the edges for a more organic feel. 70 cards is a lot and I also thought I could improve the process by making a continuous roll of background landscape and just cut it up as needed. Piecing all of those individual shapes on each card was tedious for 20 or 40 cards. 70 cards would likely turn me into a gibbering idiot. Luckily, I had a roll of tissue paper (don't ask me how or why I had it) so I was in luck; just had to trim it in half and I was all set to go.

I started with a strip of blue ocean from some of my saved bits of National Geographic maps. Next I wanted a feel of distant hills, so I chose newspaper, which visually reads as gray. Close to the foreground I needed something off white so I went with some country interior from the same Nat. Geo. maps (did I ever mention that I save EVERYthing? no? well, I do). I'm almost at the foreground, so I switched to some manuscripts from my office recycle bin. The paper is white but there's printing on it.
[I bet you're admiring my kick-ass tablecloth, eh? One of my favorites!]
 Finally, I used unprinted margins or the back side for a strip of pure white at the bottom. Along the way, every bit of the underlying tissue paper was covered.
 Next step is to cut the strips and affix to the card. Here's a rough cut.
 And here it is trimmed with doily snow flakes added. Ok ok, strictly speaking, the doilies aren't recycled, but I needed a little something to add interest in the foreground and emphasize the whole winter theme.

While the snowflakes do do both of the above, unfortunately, I find them pretty boring. Need something else....
 One of my favorite pages on FB, A Room with a View, recently posted a lovely photo of a red birdhouse. I remembered that I had a few leftover red card stock cards from about 10 years ago ( I save..., well, you know) so I dug those out and cut this cute birdhouse. The post and perch are from saved grocery bags, so more recycled points there.

Hmmm. I like the house, I like the contrast of the colors and the sharp vs. torn edges but I don't think the horizontal format works. And I still need some close-up details.
 So let's flip this baby vertical! Yes!

A few doily snowflakes come back, too. Yes! Yes!

A vintage 50's look stamp adds the final touch! (stamped in black) Yes! Yes! Yes!

[Check out the photo that inspired me at A Room with a View on FB]
Let's just tweak the layout a little bit--the stamp on top of the birdhouse was too rigid.

And here's the winner!

[Don't worry, the house is still bright red, I just took this photo later in the day with all artificial light.]

Did I meet my challenge? I cheated a little with the doily bits, but otherwise I did, indeed, use all recycled or leftover materials!  I'll sign these cards and stamp my LizzieLuvs2Recycle logo on the back and I'll be done! Yay!

And now I go into high card production mode...

Friday, December 16, 2011

Christmas Card fail and then subsequent redemption


Well, it almost never happens, but this year's original Christmas card was a failure. :(  I liked the design and the finished card looked pretty darn good but production of 60 cards was just not to be.

See how nice they turned out?

sigh

Unfortunately, all of that lovely fine glitter clogged up the acetate stencil that I had cut and it became a constant battle of cleaning out the stencil every second or third spraying. If I didn't do it that often the glitter started filling in the narrow lines of the letters, dammit. So I did that, starting to grumble. But then when the stencil started to break/tear at some of the narrow places, I saw the handwriting on the wall.

It was just not going to happen. 20 cards? yeah, I would have toughed it out. But 60? no way.
Time to regroup. Remember: "its not a mistake, its a design opportunity". Right? Right!

Ok. Well, I already had a stack of pre-sprayed background cards so it had to involve them. I did not wish to go back to the drawing board and spend an excessive amount of time conceptualizing so I (guiltily) rehashed a designed from a few years ago with a textured paper star. An added plus: I still had some of that textured paper and was happy to use it up.

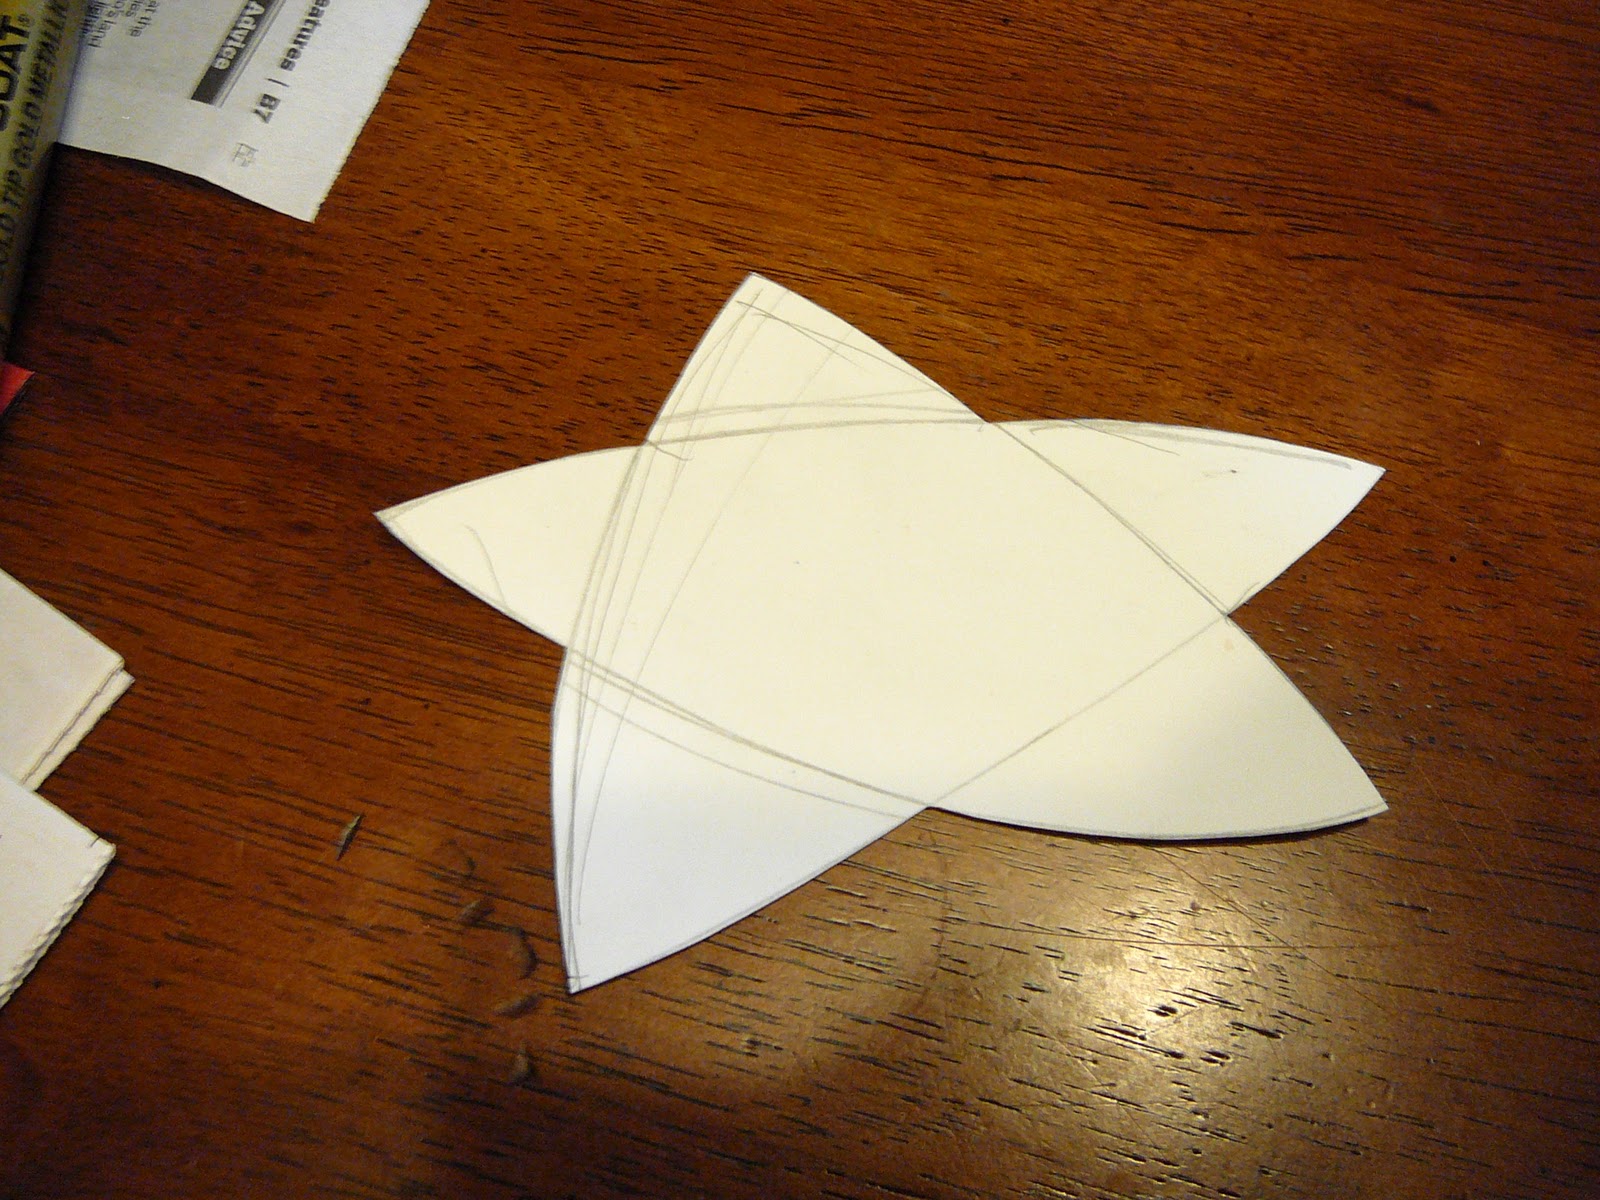
Here's my nice fat star template--I like him!


And here is my stack of textured stars. You can barely make it out, but they, too, have been sprayed with the gold glitter spray from Lowe's. Holding the spray can at a sharp angle while spraying allowed the glitter to get in the closer crevasses and not in the away crevasses, making for a nice effect. (You'll have to take my word for it; I know it doesn't really show up here).
A sheet of foam that I had saved from some shipment or other gave its life to make some little rectangles.
(extra points for recycling and keeping a piece foam out of the landfill)
And then out comes the glue gun and attaches all of that foam to the stars....
and then the stars to the cards!


And that is it. Whew--I'm done. Crisis averted. Yay!

 Time to start addressing those cards now...

Monday, December 12, 2011

Updates...

Its been a busy weekend and I made a fair amount of progress on several fun projects. So here are some interim updates on three different works I've got going. {Don't ask me why I have so many projects going, sometimes it just happens that way. Just a little crazy sometimes, I guess.} And I'm not even going to mention the 3 different kinds of Christmas cookie dough that I have chilling in the fridge. gack! Never mind--you didn't hear that--

Anyway, On my large underwater piece, I sewed down some bias tape stems for some seaweed as you can see here. I personally love Clover iron on bias tape. Its so nice and curveable.  You still have to tack it down, of course, or it will pop off after some handling. The only downside to this wonderful stuff is that its difficult to come by in colors. Usually you only find it in black (folks use it for making "stained glass" quilts). Every once in a blue moon I stumble upon it in other colors and when I do, I snap it up. So I went to my stash and found some mottled light brown tape--perfect. Also a little gold for just a short stretch.

After that was done, I spent some nice, contemplative time laying out the leaflets of the seaweed--quite a few tan ones, some yellow and a few gold ones cut into 6 different sizes. I want it to look like some of them are catching the light underwater and flashing it back at you.

Obviously, I have a lot of leaves to sew down now. I'll be doing some raw edge applique to accomplish that. Since I fused all the leaf fabric to some Pelon Shirtailor interfacing, I will have no trouble doing that with a narrow satin stitch. I got a few of them done over the weekend but by no means all. Its fiddly work and I can only concentrate for so long before I start losing my focus and start getting sloppy.

When that happens, I have found that its just no good trying to "power through" or some such. I'll just make more and more mistakes and get supremely aggravated. Maybe even have to pick out some stitches. Which I hate doing, but I'll force myself if I've made a botch of things. At least in this medium you can do that unlike other media.

So when I exhausted myself on the leaves, I took myself off to the kitchen to design this year's Christmas card. Keeping it simple this year and no textiles, either. Something with some spray paint and an acetate stencil seemed the way to go.
Here's my sketch in the actual card dimensions on the left. I'm seeing lots of glittery gold. I bought some holiday spray glitter at Lowe's last weekend and I'm thinking that it might be just the thing.

And here is the acetate sheet half cut out. I'm not a big fan of working with an Exacto knife, but I worked slow and steady and kept it together and did an ok job of making a nice stiff stencil.


And then, since I've had a several sales from my etsy site recently, I worked on replacing some of the inventory of my biggest seller: business sized envelopes. So relaxing to trace and cut these out and then so fun to fold them and watch them become an envelope. Its a simple thing but I get a big charge out of it for each and every one.


Yay!

When the weekend was over, I felt so accomplished. Even though I didn't get anything technically completed, I still was deeply satisfied.

And its just as much about the process as it is about the product, isn't it??

Friday, April 08, 2011

Christmas cards leftovers

I was scanning the archives today and realized that I never posted the 2010 Christmas cards. Shame on me! So without any further ado, here they are. 2010's cards featured some filamentous yarn and some heavy textured paper from a gift bag. I started with a large hole punch....


Isn't it great? I'm pretty good at cutting things out but there's no way I can cut a perfect, smooth circle. This punch (from Michaels, or see the one here: Uchida LV-SJCP40 Clever Lever Super Jumbo Craft Punch, 2-Inch Circle) takes care of that issue in a snap,


A gift bag was sacrificed to yield these beautiful circles in a red metallic paper with an alligator texture finish. Very eye-catching!


Here's my tree branch made out of that filamentous yarn (a swipe of glue stick Avery Glue Stic, 0.26 oz, Pack of 6, (98095) holds it down) and the ornament I punched out. I've adhered my ornament with a raised adhesive stickers.


And I couldn't forget the little thingamabob on top of every ornament!  So I covered a sticky dot with aluminum foil, shaped it a bit and then stuck it into place.


Not bad! I really like the dimensional aspect of the ornament and the yarn. Silver ink was drawn in to indicate the ornament's hook. And then they were all signed at the bottom as usual.


Unfortunately I ran out of the green yarn so a few cards went out with iridescent white branches. (uh, snowy, right??!)


Then that ran out too and some post-modern versions went out with purple branches and gold ornaments (kind of an LSU theme).  So much for Christmas 2010! Wonder what the 2011 cards will be? hmmm

Wednesday, December 23, 2009

This year's holiday card OR a tale of two adhesives

What with one thing and another, this year's holiday card didn't happen until just last week. Like last year, its a multi media collage but this year not quite so abstract. A simplified Christmas tree is the subject I chose--its so iconic I can minimize the details a lot while still depicting something recognizable. As with all collages, using the appropriate adhesive is the key. I did have some glue stick issues that necessitated a quick run to the craft store, but luckily they had what I needed. Damn that "repositionable" glue stick--don't ever buy that crap! "Repositionable" actually means that its not very sticky. Whats the point of that??? (don't buy that purple stuff either. its supposed to dry clear, but doesn't always). My hands down favorite is Scotch brand craft stick in the 1.41 oz. size. Its the best for general crafting and is perfect for dealing with fabrics. When in doubt, get the big size--the small, chapstick size tubes last for about, oh lets see now, 10 minutes of crafting. Uh-huh, very helpful. NOT.


Anyway, here's Step 1: A little time carefully measuring and cutting trapezoids and triangles and --voila! My simple, yet elegant tree. I chose three fabrics that all had some metallic gold accents. Because Christmas is all about glittery, shiny stuff, isn't it? Glue stick on the fabric did the trick here.


Step 2: More glittery stuff. A couple of swooshes of Angelina fibers add some textural and detail interest. A swipe of glue stick on the tree laid a snail trail for the angelina fibers to stick to.


Step 3: One stylized ornament made out of a coil of colored wire completes the design. I sign in pencil and I'm done. Woo-hoo! Glue stick doesn't work for wire at all so I switched to a more goopy adhesive: Uhu glue.Search Amazon.com for uhu glueSearch Amazon.com for uhu glue This glue does not soak into the fabric and disappear like water-based Elmer's and is, well, nice and goopy. Thus, the pea-sized blob of Uhu sits on top of the fabric and then encompasses the wire coil and bonds the two together as it dries.

I ended up making 80 cards. I have about half of them written and sent out and (sigh) a bunch more to go. But they're HOLIDAY cards, and the holidays last until January 6; the Feast of Three Kings (Epiphany), right???

Well, that's my story, anyway, and I'm sticking (ahem) to it.

Sunday, December 06, 2009

And yet another Christmas card...

Here's yet another one of my cards from the archives.

This card also features spray paint (love that stuff). I used a circular stencil for the ornament and made sure to apply the spray paint unevenly to give the illusion of roundness. The ornament's hanger and the greeting was picked out in silver ink.


I added some glittery star decorations on the surface of the ornament (I own some just like this, go figure). Guess what I used for the stars?


Believe it or not, silver glitter nail polish did the trick nicely. I use it frequently for small accents on projects like this. Not regular nail polish--it has be to the stuff with visible glitter flakes suspended in a clear polish matrix. It comes in all colors these days but I just used the silver stuff here.

Friday, December 04, 2009

Christmas cards cont.

More christmas cards...


Each one of these cards is a unique original mixed media collage featuring fabric, Angelina fibers (you know I love that stuff) and more, permanently mounted on heavy white card stock. This series is a limited edition and so they are all signed and numbered in pencil by the artist (me!). The card is 5" x 7" and, of course, comes with a matching white envelope. There is no interior text; I end up writing something different in each card when I send it.


Up close you can see the different components. I think the shiny cellophane tape helps to hold it all down (I did have adhesion issues with this one) and helps to make the image sparkly and shiny. Perfect for a christmas image.


A nostalgic Christmas tree graces this 5" x 7" card rendered in molded heavy paper. Heavy white card stock is the base that supports the Christmas tree rectangle. The tree rectangle is made by pressing wet pulp paper into a springerle mold. The rectangle was carefully dried and then spray painted gold at a sharp angle to accentuate the three dimensional aspects. When that was dry, the rectangle was mounted on some thin foam on the actual card. This allows the rectangle to float above the surface of the card and cast a slight shadow.


You can really see the floating aspect from this angle. Cool, huh?

Tomorrow: more cards and a few recipes, too. Stay tuned for 5 minute brownies, white chocolate/macadamia nut scones and black bean salad.

Thursday, December 03, 2009

Christmas cards of yore

Every year at about this time I create my annual Christmas cards. They have to be different each year is about the only rule that I have. And, since I make 100 or so, they have to be easy to make. Or at least, not ridiculously tedious~~of course I say that so glibly here, but I'm often kicking myself by about the 50th card when I'm committed and there's no turning back...

Anyway, here are some of my cards from years gone by that I didn't end up sending. I will be offering these for sale on my etsy site in the next day or two.


This little beauty has a textured paper star adhered to a royal blue card stock card. Gold spray paint applied at a sharp angle highlights one side of the ridges of the star. The blue card was artfully spattered with gold paint as well.


Vellum envelopes allow the star to shimmer through. I think a pen with gold ink would be best for addressing these, don't you?


One year, I just took a photo of one of my quilts, "Mixtec Sun" and printed it on heavy card stock on a matching gold background. Simple but effective. And maybe even a little pagan.


This card represented my experimentation with stamping. I used a commercial stamp with a tranquil winter scene and stamped it in a subtle sepia tone to match the cream card stock. Then I added the text, stamping each letter individually. Next, I hand colored the scene with various shades of colored pencils, keeping the palette subtle and low-key.

To finish this card, I applied a few dots of fine stamping glitter of a clear iridescent shade to mimic a light snow fall. Hard to photograph, but trust me, its there.

I'll post some more cards in the coming days. Still to come: fabric collages, home-made paper accents, more spray paint, even some nail polish.