Thursday, July 14, 2011

Paper Butterflies

When last I posted it was all about vintage maps and envelopes. And I have been working furiously to make lots and lots of them in the intervening week. But I was also becoming fascinated with butterflies and their iconic shape. With a little web surfing I realized that a lot of butterfly art is actually kind of crappy--not like a real butterfly at all. Proportion of upper and lower wings and angles are key. Its not so simple to draw a realistic butterfly, it turns out, so I resorted to my trusty Audobon Butterfly field guide, National Audubon Society Pocket Guide to Familiar Butterflies Of North America (National Audubon Society Pocket Guides) and even a real Morpho butterfly I had under glass.  (Here's a link if you're interested in getting your own iridescent blue Morpho; the frame will be different from mine, but its the same famous South American beauty: Mounted Blue Morpho Butterfly - Displayed in Framed Acrylic Case 7" x 7" x 2" ) Of course, in order to get both halves of my butterfly templates symmetrical I simply did the fold-in-half trick that we all learned in grade school when it was time to cut out hearts for Valentine's day. :)

Those resources did the trick, and, as you can see, I cut out several pleasing and biologically accurate butterfly shapes (after a couple of false starts). I wanted them oversized compared to real butterflies, but still clearly recognizable and not stylized at all. I wanted to evoke a real butterfly collection, like the one seen here in this nice pic by Mike Beauregard on Wikimedia http://commons.wikimedia.org/wiki/File:A_butterfly_collection.jpg

I think the initial thing you perceive is the variety of all of the different shapes. Then all of the colors. I plan on playing with both of those parameters in my ultimate application.


Soooooo... then came the big question: Now that I got'em, what do I do with these handsome butterfly templates?? Hmmm.  Well, I did what I always do when I'm trying to work out a design issue: I stuck them up on a blank wall so I could look at them from across the room and live with them for a few days.

Here they are in a row. Not bad.

And here they are grouped more tightly. I like them both ways, actually. After this picture, I made 3 additional ones and pasted those up so that I had a 3 x 3 square grouping. Very nice.


Well that's all for tonight.

Next post: maps + butterflies + envelopes = ????


Thursday, July 07, 2011

Vintage map envelopes

Its been a busy week and its all about making fun stuff for my new etsy store: LizzieLuvs2Recycle. So here's the latest: envelopes made out of vintage atlas maps. It was a shot in the dark as far as a recycling project and it turned out much better than expected. Fun, easy and I really love the results.

I looked for an envelope template on-line but couldn't find one that I liked (they were all odd sizes for various greeting cards and I wanted a standard business envelope). So after sitting there stumped for a while I did the whole "headslap; duh" thing and grabbed an envelope from my desk, deconstructed it and used it to make a cardboard template. Luckily, I had an old atlas in the car that was crying out to be repurposed and...Voila!

After a crafty evening tracing and cutting out the envelopes, I had this growing stack. It was very satisfying picking the prettiest maps and arranging my template for maximum interest. They already look cool, don't they??


I had this annoying long floppy ruler made out of thin plastic that turned out to be the perfect tool to act as a guide for the folds. Side flaps first...


Then the bottom flap. Looking good!

Then the top. I can't wait to use one myself!

Of course once I started cutting up the atlas, I kinda had to cut the whole thing! So now I have lots of envelopes. I ordered some glue/gum online to gum the sides down and leave a wetable gum on the flap so that it can be sealed. Hopefully it gets here fast--I'm really anxious to finish these babies and get them uploaded for sale!

 The fronts are so pretty and colorful. I will likely use an address label to give a nice white area in the center.

I can't wait to make some more fun stuff out of maps. I just bought a bunch of old National Geographic maps from eBay for some even bigger maps.

Death by Chocolate

OK--finally here's the post on those ridiculous chocolate cookies.
                                                          ***WARNING***
Do not make these cookies unless you're really serious. I mean, really. Don't say I didn't warn you. They are stupidly rich and overwhelmingly chocolate-y. If you are brave enough, here's the recipe. I got this recipe from my wanderings on the internet--it looked Ok so I copied it down. I see from my printout that this recipe is adapted (by whom, I did not record, sorry!) from Brown Eyed Baker (Google her blog--you should find her, I think). She calls them Chocolate Espresso Cookies, but my kids named them Death By Chocolate. I think that name fits much, much better. And, yeah, I've adapted it somewhat too. After all, that's what happens to recipes, isn't it? Sometimes my internet recipes don't work out (the "best muffin recipe ever" I tried recently comes to mind; what a disappointment that was) but this one is a keeper for the permanent file. When cooled, they retain a lovely velvety, yet completely baked center that just melts in your mouth. And then there's all that chocolate accentuated by the espresso.

Death By Chocolate Cookies
yields ca. 3 dozen

16 oz. bittersweet* chocolate, chopped
4 tbsp butter
4 eggs
1 1/3 cups sugar
1 tsp vanilla sugar or extract
1/2 cup AP flour
1/2 tsp baking powder
1 tbsp espresso powder
1 cup semisweet or bittersweet chocolate chips

Preheat oven to 350 degrees. Line 3 or 4 cookie sheets with parchment paper. Melt chocolate and butter in a double boiler, stirring occasionally, until all chocolate and butter is melted and smooth. Here's my chocolate to start with:
And here's what it looks like when its all melted and lovely. While that's melting, combine the eggs, vanilla and sugar in a large bowl and set aside.

Sift together the flour, baking powder, and espresso powder. Slowly beat the chocolate and butter into the egg mixture until well combined. Gradually beat in the flour mixture until a smooth batter forms. Stir in chocolate chips.


The batter will be pretty runny/goopy. Drop by tablespoons of batter on to the parchment lined cookie sheet. You can see mine there to the left. And, yes, the parchment is necessary. You can get some somewhere in the vicinity of the wax paper and aluminum foil in your local grocery story. At least, that's where my local store keeps it.


Bake for 8-10 minutes or until they are firm on the outside. Remove from oven and let cool for 5 minutes then remove to a cooling rack with a spatula. You can eat them warm for the most intense chocolate fix. Or let them cool and mellow if you are more faint of heart. Either way, pour yourself a BIG glass of milk, sit down and take it slow. One cookie to start, maybe a second.

* Both times I made this recipe I did not have the full 16 oz. of bittersweet chocolate. As my google search told me, you can substitute semisweet and unsweetened chocolate. You will lose some depth of chocolate flavor but its doable. Of course, if you substitute to all unsweetened chocolate, your cookies will not be sweet enough so balance some semi sweet in there too. This last time I had 12 oz of bittersweet (you can see the 3  4 oz. bars of Ghirardelli 60% bittersweet chocolate) 2 oz of Baker's unsweetened chocolate and 2 oz Baker's semi-sweetened chocolate.

Sunday, July 03, 2011

Fourth of July Trivets!

And I'm still cutting up T-shirts and making stuff. I love it! So much fun. The only not fun part is the amount of time it takes to do the actual cutting.  I have to figure out a way around that.

So here are my latest two creations: a pair of red, white and blue trivets for the Fourth of July barbecue.  And you can see I'm really ready with my hamburger salt and pepper shakers (a recent ebay purchase--aren't they adorable?)

Aren't they fun? I seem to be getting the hang of making them so that they'll lay flat. At this size, anyway.

Here's a close up of the stitches. I really don't know the name of the stitches since I'm not a big crocheter and have never learned to follow crochet directions.  But I'm being neat and consistent so I figure that counts as much here as it does in knitting.

That's all for today.  I haven't forgotten about the Death By Chocolate cookies--don't worry! I did just buy all the necessary ingredients and hopefully I'll bake and post about those tomorrow.

Also coming up soon: a knitted T-shirt trivet for those rectangular casserole dishes.

By the way. If you really loooove these trivets, you can buy them! I have opened a new on-line store at etsy for my recycled goods. I figured that they just didn't fit in with my textile art store so it was time. You can see these happy trivets and some of my other recycled crafts at http://www.etsy.com/shop/LizzieLuvs2Recycle?ref=seller_info . Keep checking back as I am adding new items almost daily as I get going!

Friday, July 01, 2011

Project # 2

Remember how I said that I was working on a couple of fun things at the same time*? Well, here's the second one. A friend of mine is pregnant with her second child and I decided that second babies deserved some nice things too--not just hand-me downs! The mat knitting got me itchy to start another knitting project so here it is. A classical take on the ever popular baby blanket. Isn't it cute?? And you would not believe how soft and cuddly this yarn is--absolutely scrumptious!
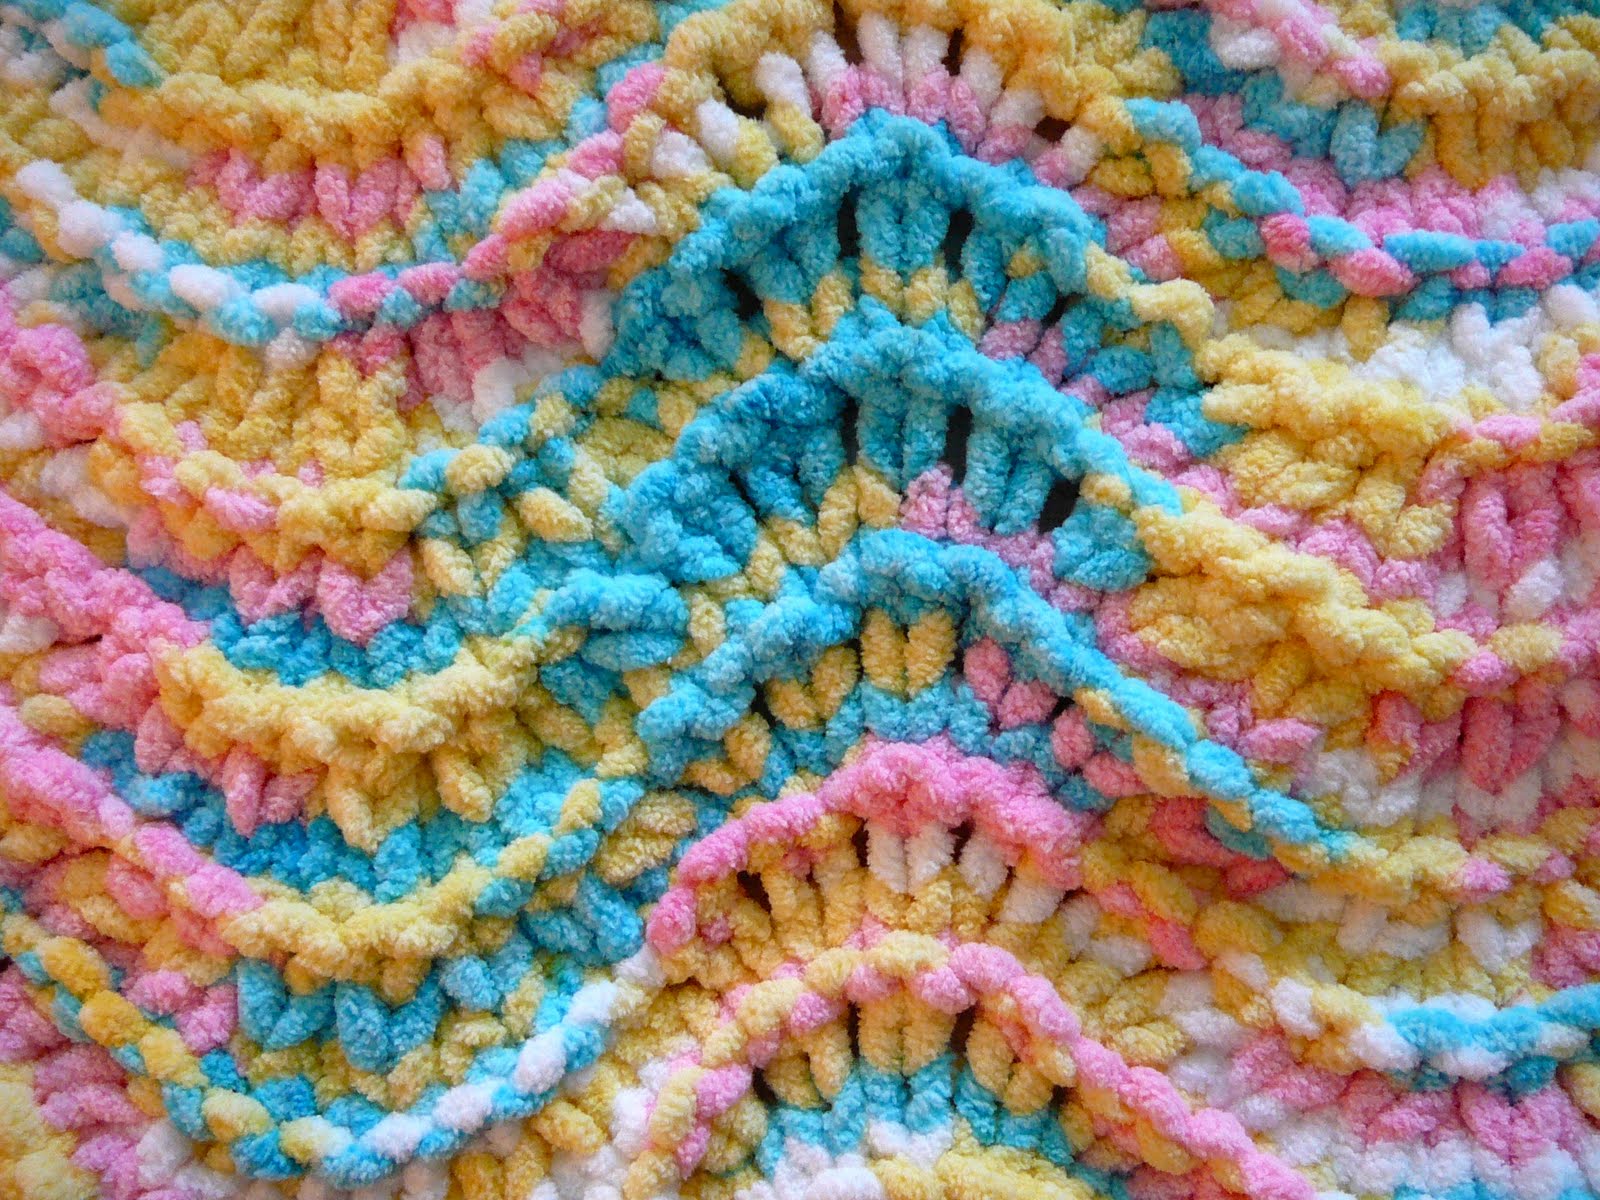
Here's a close-up of the stitches. I've used this pattern before for a baby blanket years ago. Its called the feather and fan pattern. And despite what it looks like, it is soooo easy. Only 4, count'em 4, rows in the pattern and only one of those rows is a counted pattern row. Believe me, it doesn't get much easier than that.
Here it is:
cast on a multiple of 18 st.
row 1: (RS) Knit
row 2: Purl
row 3: *(K2tog)3X, (YO, K1)6X, (K2tog)3X*, repeat from *
row 4: Knit

In a fine yarn the pattern looks a lot more lacy and delicate--all of those YO's, don't you know. But I'm knitting this in a bulky weight yarn: Bernat Baby Blanket Yarn as seen here. So I'm using size 8 needles. The combination of those two means that this is knitting up FAST! This stuff is awesome--so soft and it knits up fast (being bulky and all). And its machine washable and dryable; a must with all baby items.

I'm having such fun--I haven't knitted anything in ages and my fingers are thanking me! By the way, I got the pattern for the blanket out of my very favorite knitting pattern source book of all time: A treasury of knitting patterns by Barbara Walker. There are countless knitting pattern books out there (and I have quite a few) but none of them match up to Barbara Walker's books. She actually published 4 treasuries and they are classics. I cannot recommend them highly enough.

* can you tell I've had the week off??

Next up: "Death by chocolate" cookies. Not for the faint of heart--serious chocolate addicts only. :)

Thursday, June 30, 2011

Mad about Mats

So here are a couple of the recycled T-shirt mats I've been working on. I tried knitting a mat and was not happy with the way it turned out. The strips are of varying widths and thicknesses so the different stripes in the knitted mat made for very uneven knitting gauges and an uneven appearance. So I ripped it all out and crocheted these.

Here's the oval one. Shades of pink, coral white and light blue. Its a little flippy around the edges but I think thats just the nature of the beast. Once its done and I give it a good steam press I think it should relax a little. I've got a ways to go on this one. I envision a nice broad one next to my shower stall door. Or, I'll sell it--whatever!

Here's a close-up of my technique. I haven't had much practice with crocheting but I think it looks OK. I like how the ends that I've knotted together poke out here and there.


Here's the little round mat I already finished. The constantly expanding circumference gave me some trouble as I had to continually add stitches so that it would lay more or less flat.

It feels good on the feet. Not soft and plush, mind you. But knobby, bumpy and absorbent. And of course, being T-shirts from another life, eminently washable.


And here's a shout out to my homies who have contributed dead shirts to the cause: Thanks Fiona, Helga and Valerie! Couldn't do it without your generous donations!

Wednesday, June 29, 2011

Recycle mania

Hi everyone--I've got two new projects cooking so I need to fill you in! The first is an offshoot of my T-shirt textile postcards. I'll be selling my postcards in a fun shop down in Winter Park soon, so I was gearing up to make enough for the order. The shop is Earth Inspired Living and it is just perfect for my T-shirt postcards. Or my postcards are perfect for the shop. Hopefully they will sell well and I'll get lots of future orders for more cards. I'm pretty excited to enter the world of retail.

Sooooo....I got to looking at all of the leftover T-shirt material after I had cut out the images for the cards and thought: "hmmmmm, hate to throw all of that away". So I cut the remaining shirt material into continuous inch (or so) wide strips and knotted them together as you can see here. Looks suspiciously like a ball of yarn, doesn't it? Did you know that I'm a big knitter from way back? Haven't done any knitting lately--we just don't need wool socks and sweaters here in Florida so its pretty pointless.  So I dug out my needles and started playing around. A little experimenting with knitting and crocheting and I hit upon the right procedure and guage. I'm thinking: bathmats, trivits, coasters, small rugs. Should be fun!  I'll post more pictures soon, stay tuned!

Monday, June 13, 2011

Quick update

 Just a quickie post to stay in touch and let you all know that while I have been working that pesky day job I have also been trying really hard to keep up with my projects. Here's two solid rows of the stencil repeat. At this point I'm not really sure how many rows I'll end up doing. At least one more, maybe two?? I'm just not sure.

Here's a close-up of the little recycled quilt. Its all pinned now and ready for quilting on the machine. Still trying to decide about the quilting pattern. Organic free form curves doesn't seem to go with the whole feel of this piece. Straight line sewing and contour outlines seem most likely.  No rush on this now--I missed the entry deadline for the show I was thinking about. Oh well, that's happened before--its no biggie. I figure I get a different sort of piece in my inventory, one that I wouldn't have ordinarily have tried if hadn't been for the entry requirements.

Well, that's it for tonight. I have some more postcards in the works and you'll be seeing those here really soon too.

Sunday, May 15, 2011

Recycled fabric finds a new fate

 So a couple of weeks ago I saw a call to artists listing for a show soliciting fabric pieces employing recycled materials. Well! That's a subject near and dear to my heart. So I gathered some old shirts and bed linen fabrics (and a few accent fabrics to even things out) and started putting them together. As you can see, I have several shard-like pieces assembled here. I plan on integrating some written word as well.


Here I have sewn all of the shards together. I ended up with 5 of the shards with the word boxes rather than the 8 I started with along with some accent triangles.

To liven up the composition I made several horizontal cuts above and below the text boxes.

 Here's the final composition all sewn up and ironed down. Quite a bit more dynamic.
And then to further the fractured theme, I added some fusible bias tape in shades of black, purple, red and orange. I always keep some on hand for odds and ends (although it is hard to find in stores in colors besides black). Clover Mini 11-Yard Quick Bias, Black I have used it in straight lines here but it makes lovely curves too. You iron it down and it stays put well enough to be sewn down permanently.

Quilting is next!


Sunday, May 08, 2011

More wall patterns

 Happy Mother's Day to all you moms out there! I got to spend a lot of fun time doing stuff I love today, thanks to my awesome kids. I started out the day working on the wall. Here is where I started this morning.....
And here I am up on that ladder dabbing on my gold paint. And, yup, you guessed it, I'm still in my pajamas.  What could be better than crafts in the morning in your pajamas? Nothing! That's what.


And here's how far I got. Just had to get a couple of repeats for the second level--cool, huh?

I also worked on my quilt top for the new small piece. I'll post tomorrow on that one. I think its almost done.

Friday, May 06, 2011

Say good-by to beige and boring!

My oh my what you can do when you take the day off! I worked straight through the day on a new quilt wall hanging for a particular show involving recycled materials, a subject near and dear to my heart. I'll post on that tomorrow. When I had that pretty much under control (pretty much finished the top), I tackled another project I've been contemplating for a while--a new wall treatment for a big beige wall. Woo-hoo!

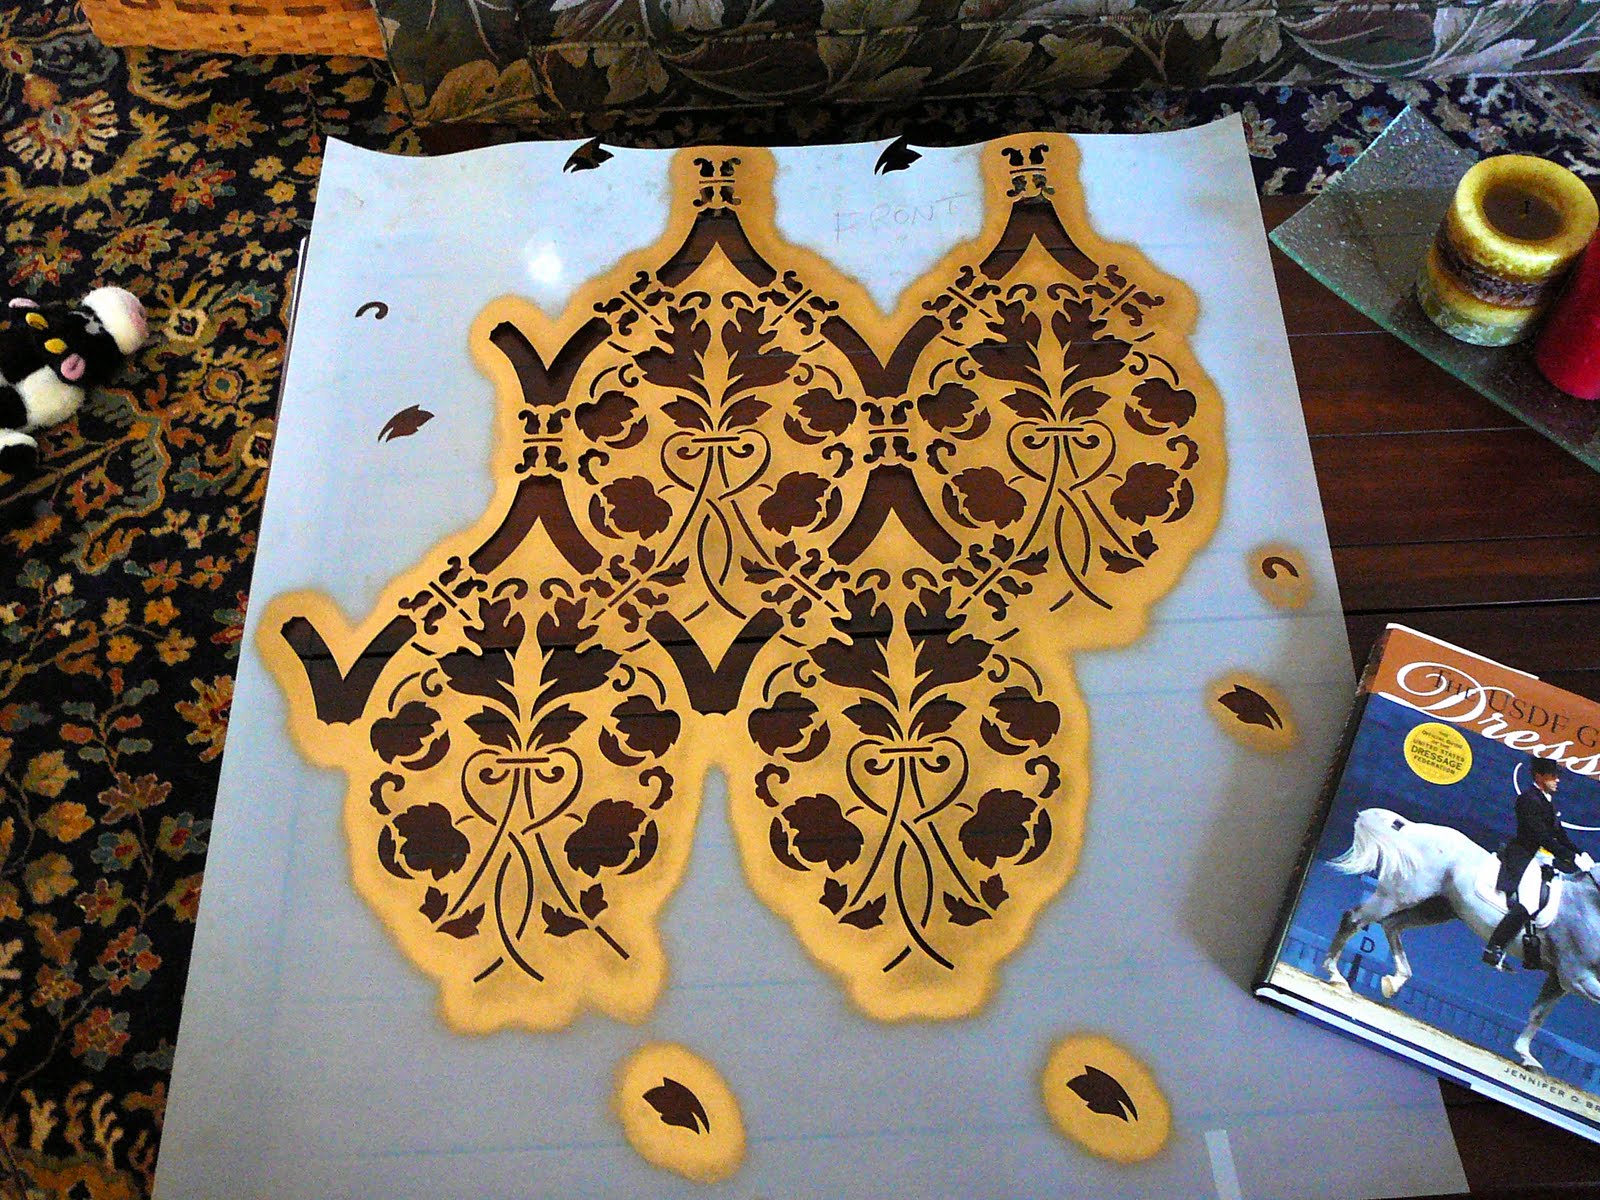
Here's the stencil I unearthed that I had used in our previous house. You can see that I used gold last time and I plan on doing so again. I love iridescent gold because it so forgiving. Any variations in amount of paint, heavy or light, blend right in to make a shimmery effect. So you don't have to worry as much about being super neat or consistent. And, of course, I have a lot of gold accent pieces in my living room which play off of the wall and vice versa.

I ordered the stencil from an online source--I'd mention it but,  sorry!, I can't remember it, its been so long. But do a google search for all-over stencils like I did. You should come up with plenty of hits like I did. Turns out there's an enormous online stencil community. Who knew??

Here's the first couple of repeats. (well, one and a half, actually.)  I have plenty more to go, obviously. But I already love it. I am using a gold Shiva Paintstik Shiva Iridescent Professional Grade Paint Sticks set of 12 for the pigment. Another necessary item is stencil adhesive Sulky Temporary Spray Adhesive 3.6 Ounces KK2000; 2 Items/Order Painter's tape is also a must-have--just the regular blue stuff will do. ScotchBlue Painter's Tape Original Multi-Surface 2090, 1-inch x 60-yard, 4-Roll
I'll keep posting so you can see my progress. Its hard work and my arm and hands get tired from the dabbing so it will be a slow and steady kind of project.


Sunday, May 01, 2011

Planning for Humpty

 So I'm finally mapping out my Humpty Dumpty piece that I originally conceptualized way back in 2009. And, yes, I frequently do take that long to mull over a particular piece. Sometimes it just takes that long to come together. And I've learned that there's no sense in trying to rush the process. Best to work on other things until the larger piece coalesces.

Anyway, I always start out with a little thumbnail sketch or two to kind of work the major layout issues out. That, along with any notes and ideas I wish to record gets entered into my sketchbook. But once I'm past that stage and its time to actually get a full scale mock up complete with templates etc., its all about tracing paper. I absolutely could not survive without gobs of the stuff. Top Flight Tracing Paper Tablet, Transparent, Erasable Surface, White, 9 x 12 Inches, 40 Sheets (65301) I get everything traced out, cut it apart and then tape it down and shift and tweak until the composition is perfect. Tracing paper is very easy to draw on and erases well without falling apart. I have several pads in various dimensions and a big roll of it too. Love. the. stuff.

Here you can just make out Humpty on his wall.  Woods beyond the wall, and a garden on this side of the wall as well as a path looping out from the wrought iron gate next to Humpty. A big blue sky above and lots of puffy clouds completes the piece. The image dimension will be about 20 X 36".  At least thats the plan right now. Always room for alterations if something doesn't look quite right. Collages are forgiving that way. :)


 Here's Humpty's body. I drew out the egg separately and then traced each limb on a separate piece of tracing paper until they were all just right and then I had fun attaching his limbs appropriately. I wanted him to look rotund (of course) and very precariously wobbly. This is that sick moment that he knows he's going to fall but hasn't quite yet but knows its inevitable.
 I wasn't sure about facial expressions so I tried a couple of different ones out, also on a separate piece of tracing paper. Here's shocked and disbelieving. His mouth is just kind of hanging open.
And here's horror/fear. Mouth is in full scream mode.

I may have to sketch out a couple more. I'm still not quite sure which one I like the best. Right  now I'm leaning a little towards the first one (above).

I dunno. Have to sleep on it. I could also do the old mirror trick: when you're having trouble with a composition, look at it in a mirror; flaws and issues just jump out at you (and are thus fixable). I can't wait to get this all pinned down and start choosing fabrics. That's one of my favorite parts!

Here are a couple of commercial links as usual. Tracing paper, of course and my all-time favorite version of Mother Goose. The illustrations are charming and intricate--beautiful (something I always look for in a children's book that I am likely to read out of repeatedly).


Monday, April 25, 2011

Odds and ends in red red red

 Not too much creating going on in the last week but here's a sweet picture of my beautiful daughter wearing her felt flower that I made a couple of weeks ago and posted about.

She wore it in to school and even wore it to her volleyball game that evening.

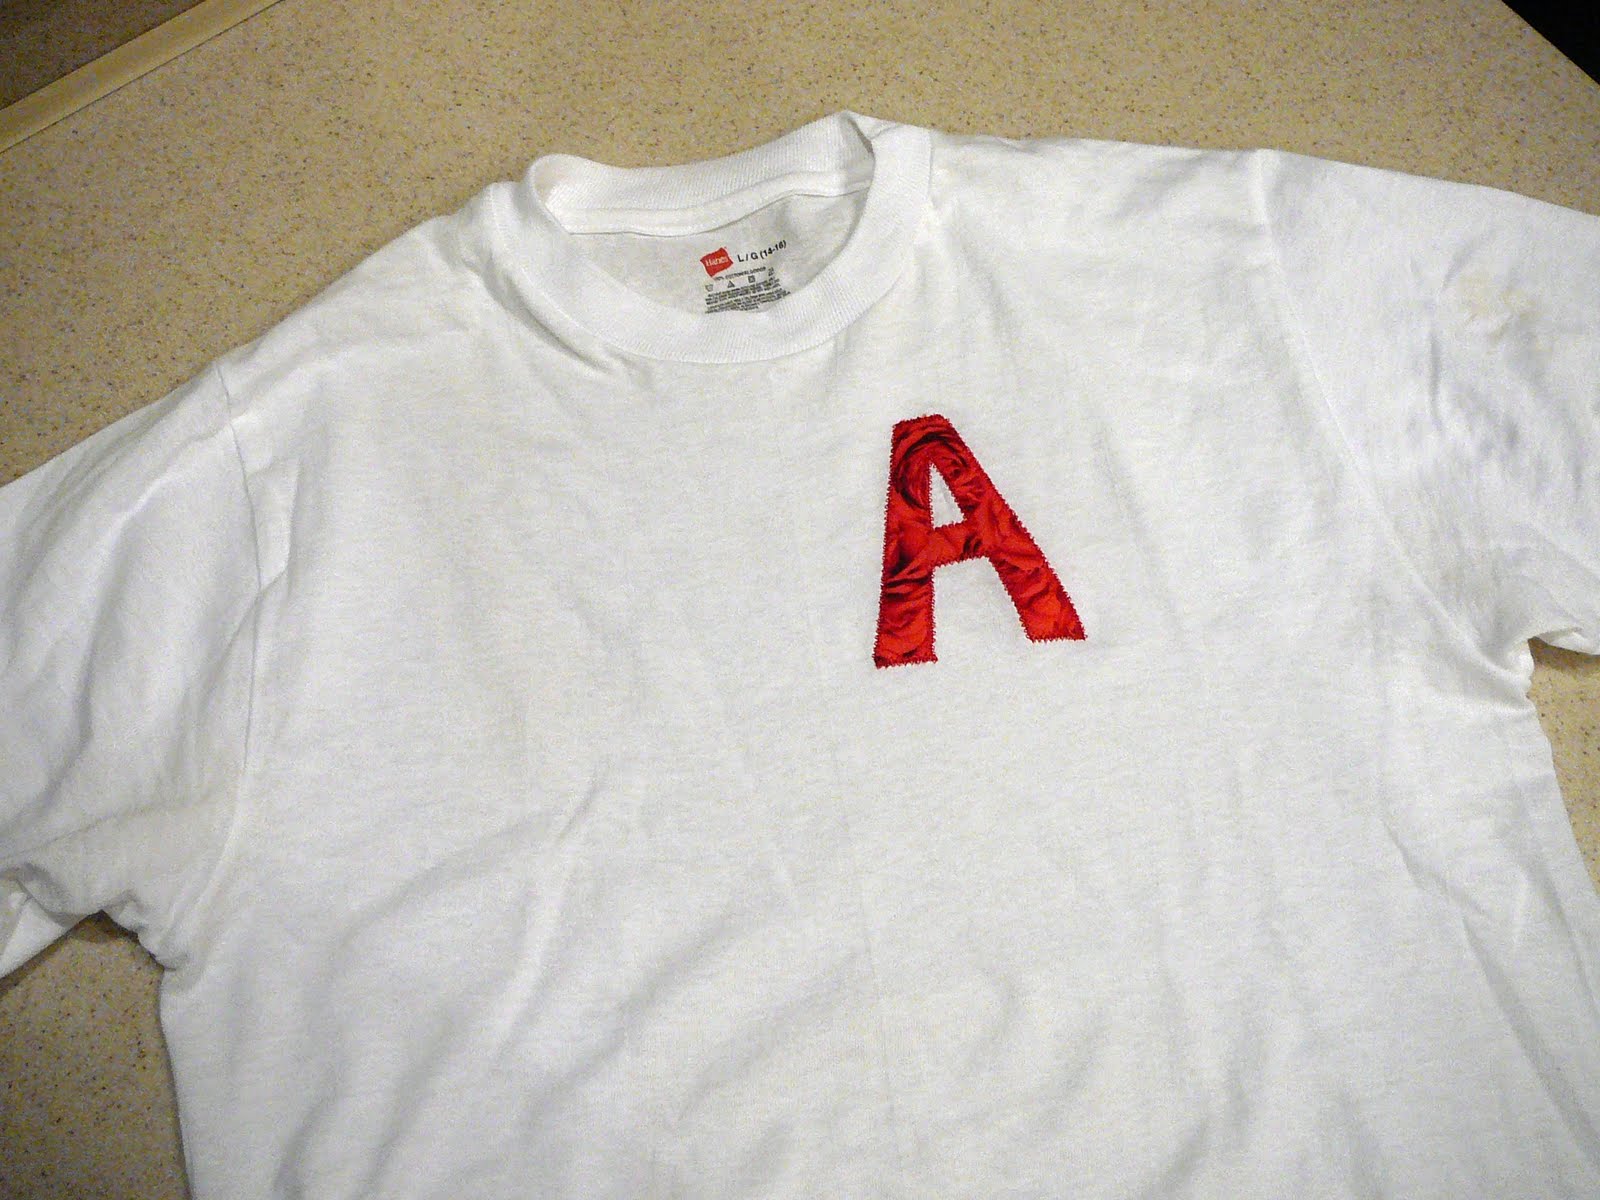
While I didn't create any major art this week, I did help Fiona with a big school book project today. She has to give a powerpoint presentation, wear a costume, provide a snack, handouts and a quiz based on her book. So I helped with the costume of course. After a little embellishing of a spare white T-shirt and some scrounging in my closet we came up with a pretty decent assembly of clothes. Here's my sewing contribution--you get one guess as to the name of her book. :)

I stabilized the rose print cotton fabric with Shir-Tailor fusible interfacing Pellon Shir-Tailor Fusible Interfacing- 20 Inch W x 25yds, cut out the A and then stitched it down using a decorative diamond stitch. On the inside of the shirt I placed some Tearaway embroidery stabilizer Regular Tearaway 8x8 200 Precut Sheets for Embroidery Machines. That way the cotton fabric doesn't shift or fray and the stretchy T-shirt knit doesn't give and stretch too much while I'm sewing. For a quickie project--turned out pretty good!